
Even though I live in North Texas, I love being outside. Ninety degree springs, 105 degree summers or 95 degree falls. Doesn’t matter… I’m there.
My apartment’s patio is on the smaller side, but that doesn’t stop me from spending time on it, so I’m set on making the most of it!
The last thing I posted about my patio was the colander that I turned into a planter. This project is considerably more substantial.
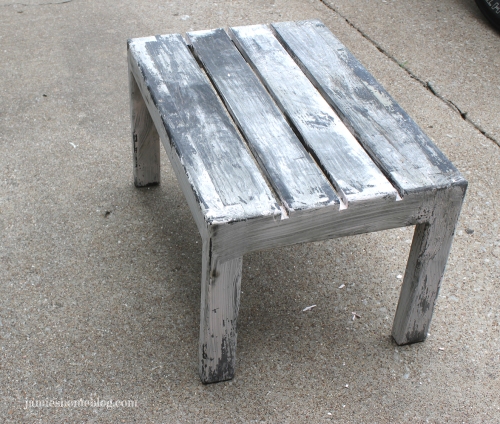
I got this little wood table at my local Goodwill for $5. That was four years ago.

When I bought it, my plan was to give it a face-lift in the coming weeks but, you know, life happens. For a while it served as a nightstand:
But then I made my own nightstands and I didn’t need it there anymore. So it sat in storage for about a year.
I finally got my tail in gear and color blocked it. It was actually pretty easy, just a bit time consuming. Here’s how I did it.
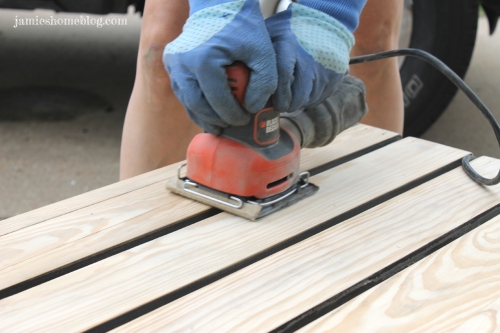
Step 1 – remove existing finish.
I tried using citrustrip but there were too many heavy layers of black paint for it to do any good. It looked pretty gross.
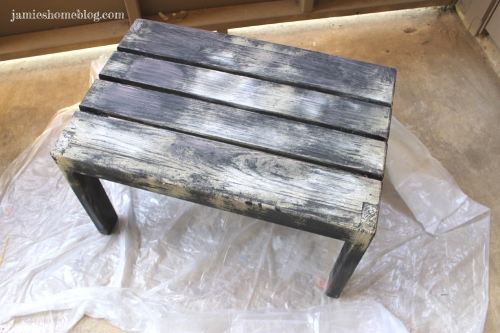

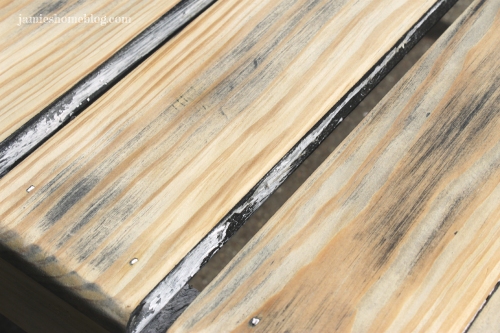
I ended up sanding the large surfaces with my power sander and the smaller surfaces, like the slats, by hand. With as thick as the paint was, the sanding actually went by very quickly. I went from 80 grit to 150 grit to 220 to get a nice smooth finish on the wood.

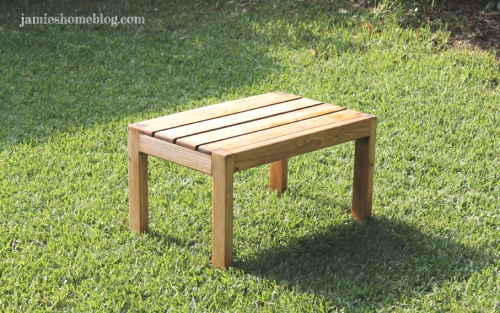
Step 2 – clean.
This part was easy! I just hosed it down and let it sit in the hot afternoon sun for a couple of hours.

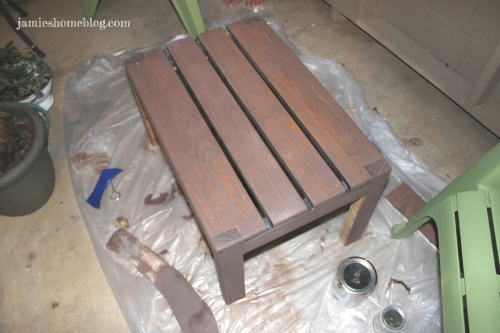
Step 3 – beautification.
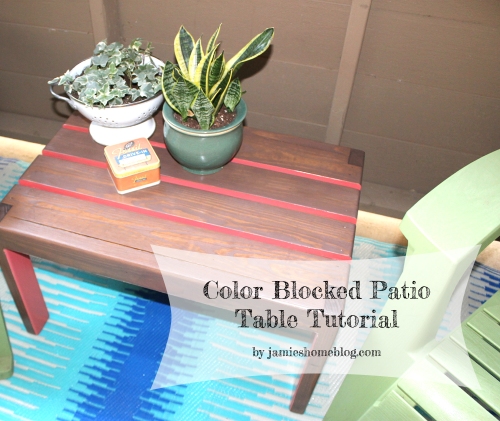
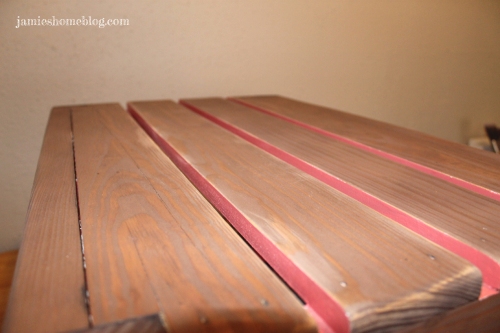
I wanted a two-tone table, and after some deliberation, the council at jhbhq determined that the underside would be a bright color and the outer surfaces would be stained.
Step 3a – stain.
I mixed Varathane American Walnut with Varathane Sunbleached and it came out a velvety, milky, muted walnut color. I love it!
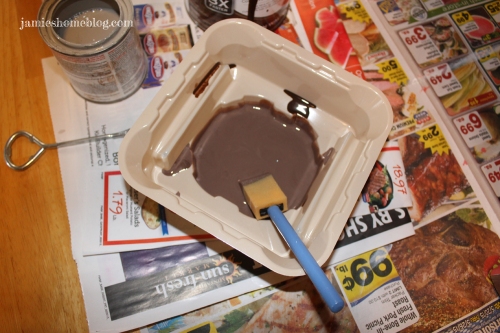
I always apply stain to wood wearing plastic gloves and most of the time I use an old cotton athletic sock that I can trash later to apply the stain to the wood. Clean of course. Please don’t use a dirty sock to apply wood stain. I’ll judge you.
I let the stain sit on the wood for a couple of minutes and then used a clean portion of the sock to wipe the excess stain off the table.
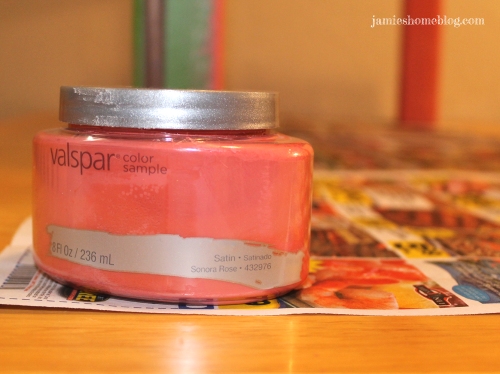
Step 3b – paint.
I ended up going with a vibrant pink to paint the underside of the table. This was a Valspar half-pint sample that I picked up on a trip to Lowe’s one day. The color is called Sonora Rose; Lowe’s featured it in their Color Studio 2013 Spring Palette.
Before I could paint, though, I had to tape off all of the stained surfaces that I didn’t want to get paint on. I used frog tape but any painters tape will do.
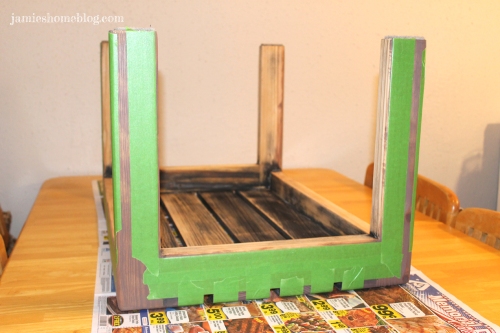
I primed with one coat of Zinsser Bullseye 1-2-3, and then applied two coats of the Sonora Rose.


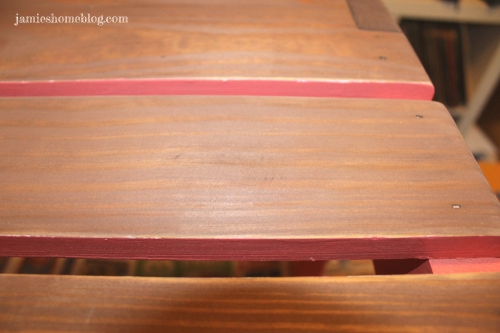
Step 4 – error correction.
Clearly I didn’t apply the tape as well as I should have. I had some bleed through with both the paint and the primer.
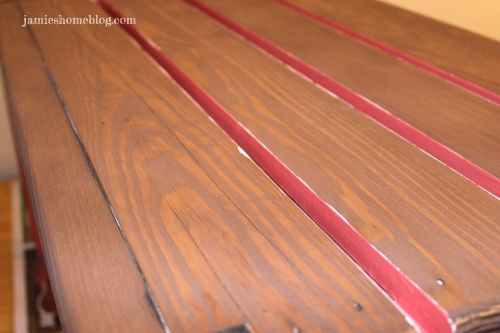
I grabbed a piece of 220 grit sandpaper and carefully sanded off my mistakes.
Step 5 – touch up.
The stain needed a bit o’ touch up after my error correction. Same as step 3a here – just less stain.
Step 6 – protect.
I finished the table off with two coats of polyurethane to protect it from the elements. I usually prefer to use spar urethane for outdoor pieces because of its superior waterproofness, but this table is under a covered patio so polyurethane works just fine.

Step 7 – relax and enjoy!
I absolutely love how the pink pops through the slats and peeks out from the underside of this table. It turned out exactly how I saw it in my head!
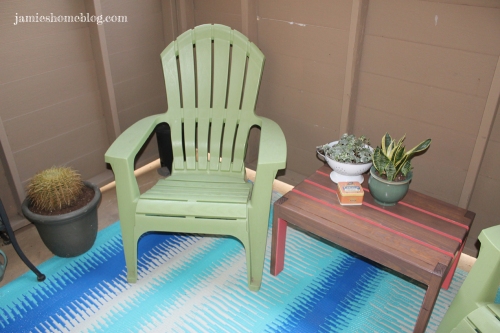
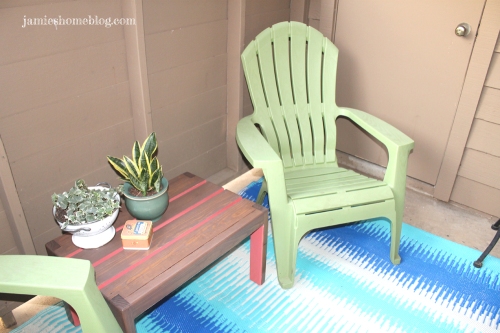
Besides adding the table to the patio, I also added an outdoor rug so I don’t have to look at boring concrete while I’m hanging outside.
The rug situation is strange, actually… Back when I posted about my colander planter, I included a crudely drawn rendering of how I wanted the patio to look.
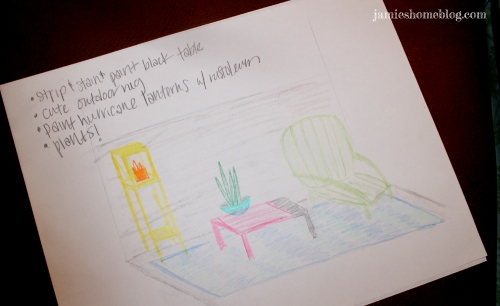
Then I go to Lowe’s one day and see this guy.

Whoa. Seriously. Exactly what I drew. I’m some sort of rug prophet, guys. Serendipitous fo sho. I snagged it for just $30!
The patio has definitely improved!
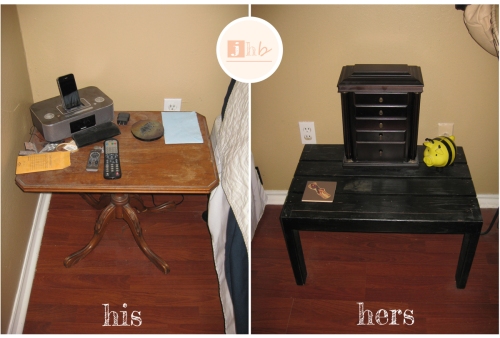
Lets look at one more before and after, because we all love those, don’t we?

I still want to spray paint my hurricane lanterns a fun color…

But for now, the folks at jhbhq are quite happy with the outdoor living space here!
Do you have a tiny outdoor space like mine? What do you do to make the best of it?

I don’t have an outdoor space right now, but when I did, it was just used for storage, mainly car parts and other grody things. I used to have a severe bug phobia, so I never spent time outdoors. Now though, I would love to have a patio to put some plants, and maybe a bird/squirrel feeder! I would love to sit outside on summer evenings and enjoy the firefly shows, and be a tasty buffet for mosquitoes, haha. Love the rug idea, I never would have thought of that. It really cozies up the place. I also love the 2 tone table idea, I may try that one day if I get an unfinished piece (I don’t have your patience for sanding lol).
Thanks, Ria! I’m so happy with how the patio turned out! I definitely spend even more time out there now that its so cozy!
Pingback: Liebster Time! | jamie's home blog
Very nnice blog you have here