Category Archives: Cleaning

How To Un-MacGyver Your Curtains

taking down curtains put up with 3M command strips

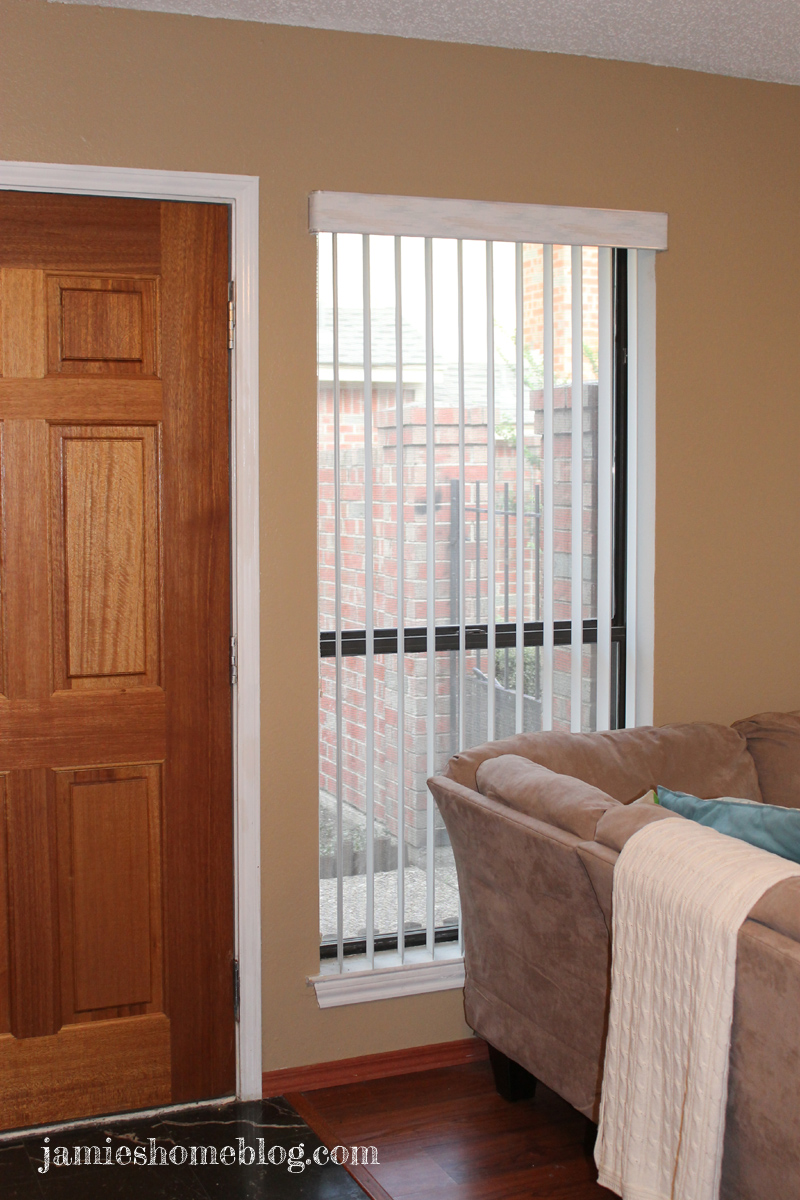
My second-most popular post ever in jhb history was this one where I hung curtains in a creative, albeit rudimentary, sort of way.  I think it’s safe to say that most renters struggle with whether or not to hang curtains, because some landlords are so very strict about damaging their walls (understandably so).  I also faced the challenge of having a window on a mirrored wall (helllooooo 1983), which I was most certainly not willing to drill into.

See me?  Ask me how fun it is to try and take pictures of your living room for your blog with this bad boy getting in the way…

taking down curtains hung up with 3M command strips

Anyway the quick and dirty version of the story is: because the 16 lb weight capacity 3M Command Strips weren’t strong enough to hold up my curtain rods, I decided to run a bead of Turbo Tacky glue down the strips to hold them together.  I then promised to return to you to talk about taking them down.  Here I am.  Feel free to check out the original post for the full rundown of the original installation but be forewarned – I couldn’t find my point-and-shoot so you’re going to be stuck with really bad iPhotos.  Sorry, friend.

Oh and to answer your question: yes it drove me batty to look at highwater curtains for the past year but not as much as it would have to look at those 80’s-Special plastic and pastel fabric vertical blinds.  Pick your battles with your house, people.  Really, I kept meaning to get new curtains but it just didn’t happen, k?

taking down curtains hung up with 3M command strips

The removal was really easy and I’m pretty pleased with myself for coming up with this little idea, although I will say it worked better on the mirrored wall than on the textured painted drywall.

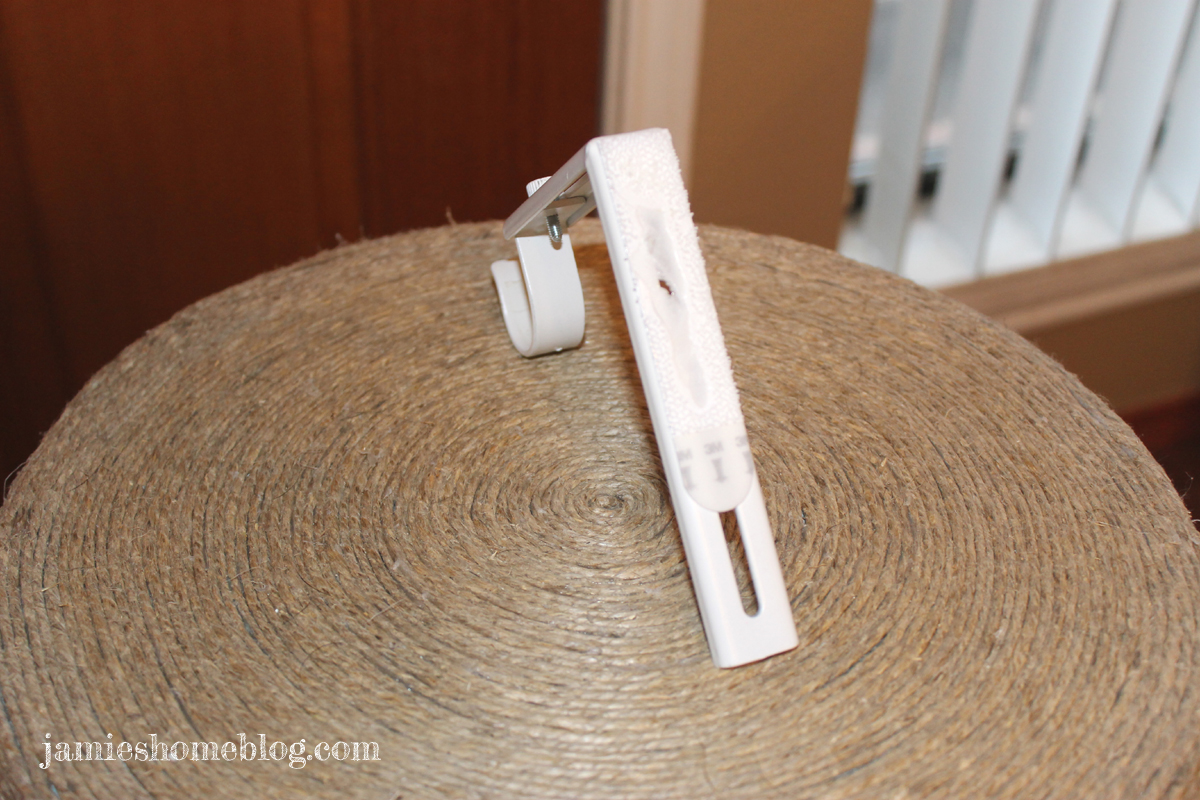
I grabbed my box cutter, put in a brand new mega-sharp blade and very carefully and slowly ran the blade down the length of the dried glue.

taking down curtains hung up with 3M command strips

That left me with this little guy.

taking down curtains hung up with 3M command strips

You can see where the glue was at; I tried to angle the blade in a way that favored the wall to avoid gouging it.  So the line of glue you see is actually both sides of the command strips stuck together, which left a hole in the strip stuck to the bracket.

taking down curtains hung up with 3M command strips

But check it out, guys:

taking down curtains hung up with 3M command strips

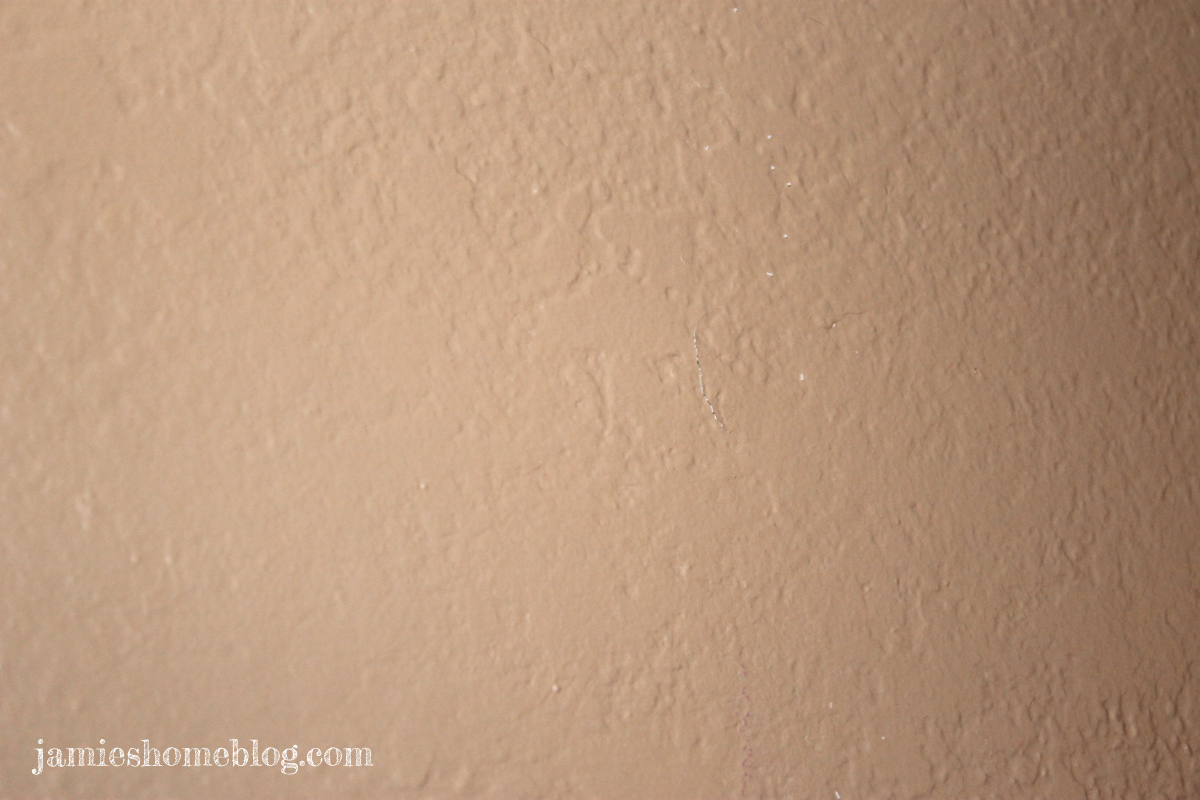
Zero wall damage.  And it only took a few minutes.  The white spots you see are leftover adhesive from the Command strips, which rubbed off with a swipe of my finger.  Victory!  Except for with the second bracket, where I slipped a bit with the blade and gouged the wall.

taking down curtains hung up with 3M command strips

Womp womp.

Obligatory safety police post: BE CAREFUL WHEN YOU’RE USING A BOX CUTTER, KIDS… That is, if you like your wall.  And your fingers.  And toes.  And floors.  Etc.

The removal was even faster on the mirrored wall because the surface is much more durable, thusly making it easier to pull the command strips with vigor, without worrying about pulling off any paint.  I forgot to get an after picture for you guys but its basically this without a bracket on a mirror.  Anti-climactic but true.

taking down curtains hung up with 3M command strips

The strips didn’t even leave any residue on the mirror.  And they held up my curtains forever. Wins all around.  Except for whomever bought this condo.  Sorry ’bout your new-old blinds, friend.

taking down curtains hung up with 3M command strips

Guys, I’m almost 100% packed up and ready to bust out of this natural-light-lacking little condo.  My next post will probably come to you from the new jhbhq.  In the interim…

Have you hung curtains without drilling holes in your wall?  What was your method?  How did the removal go?  Do tell…

Advertisement

This is Why You Always Clean Your Brushes… Completely

Hey internet.  So… after proclaiming a couple of weeks ago in my blogiversary post that I’d like to be on here more often, I went silent.  There are a host of things happening at “jhbhq” (good and not so good) that have kept me away.

Namely, the feller (my mega-handsome boyfriend, whom I’ve known for around 13 years, and have been dating for almost the last four of those) is on a little overseas visit with the US Air Force.  Over the last couple of weeks, as we prepared for his impending departure, my efforts and attention were focused on enjoying our time together, not my diy and craft projects.  I mean really look at this guy…

Feller

I’ve basically been vacillating between being super proud of my Airman and weeping because I can’t share life’s daily adventures with him.  Luckily for me, my bestest friend won’t be gone very long.  Luckily for you, I am going to do my best not to whine about it.

That being said, I now have amplified free time in the event of his absence, so you may see lots of little crafty crafts on here, along with some larger projects that are both in-progress and in the pipeline.  For now I’m going to pop in really quick to show you how I royally screwed up one of my in-progress projects.

this is why you clean your brushes properly #diyfail

Friends, when you use oil based primer, you have to clean your brushes thoroughly with mineral spirits if you plan on ever being able to successfully use them again.  I do this every time I use oil based anything.  Including the last time I used this brush (a Blue Hawk brush for oil based paint).

this is why you clean your brushes properly #diyfail

But…

As you can see from the picture, I half-assed it.  Admittedly, when I last cleaned the brush, I was having serious trouble getting all of the primer off (probably because I waited a smidge too long to clean it), and I’d been at it for what felt like a half hour, and it was late at night, and I was hungry, and I had to get up early the next morning for work.

So I said “Self, these last flecks of primer are NOT leaving this brush.  They live with this brush now, and they will do so until the brush dies.  They’re faithful little primer stains that won’t ever come off.  Not even the next time I take out the brush and use it.”

And then yesterday, when I dipped the brush in some polyurethane and brushed it onto this carefully painted black surface, those flecks dropped from that brush like it was their job.  Ahem.  It WAS their job WHEN I WAS CLEANING THE THING!  And now my black surface looks like some sort of janky constellation map.

this is why you clean your brushes properly #diyfail

Now that I’ve spent a day pouting about it, I’m able to share it with the world in hopes that you wont be as lazy as I was the last time I cleaned this thing.  I’m not sure how the heck I’m going to fix my project but I’m going to spend the weekend trying.  Hopefully my next post about this project will be a reveal and not another #diyfail.

Today’s takeaway:  Don’t be lazy, clean your brushes properly, and in a timely manner.  If you have some walking around sense, you’re buying good brushes, and replacing them after each use just isn’t practical.

Have you made a lazy mistake during a craft or diy project?  How did you fix it?  Anyone have any suggestions as to how I should remove white flecks from polyurethane without damaging the black surface beyond repair?  Do tell…

DIY Eco-Friendly Brass Tarnish Remover

In my recap of my visit to Ft. Worth Vintage Market Days, I ended with a little teaser as to what the third and final item was that I purchased at the event.  If you guessed that it was the brass clock…

Fort Worth Vintage Market Days

You’d be close, but wrong.  I reeeeaallllly wanted that clock, but they were asking well more than I wanted to spend.  The brass-rimmed wicker bowls, however…

Brass and Wicker Bowls

Were priced oh so right.  Here’s a better (non-phone-in-dark-lighting) picture of them.

diy eco friendly brass tarnish remover

They were marked at around $7 each, and I ended up walking with all three of them for a cool $12 plus tax.  I love the rustic, sort of primitive look to them.  Problem was, they were pretty tarnished.  Most store bought tarnish removers on the market have a ton of chemicals in them, so I decided to go the au naturel (aka safer and cheaper) route.

diy eco friendly brass tarnish remover

I tried three different methods, and I’m here to share ’em all with you!  It’s like a Goldilocks (Brassilocks?) Cleaning Story.  Come along.

Supply List:

  • White Vinegar
  • Baking Soda
  • Salt
  • Lemons
  • Frog Tape
  • Rubber gloves (both to protect my hands from the mixtures and protect the brass from the natural oil that hands produce)

diy eco friendly brass tarnish remover

Procedures:

They got the frog tape treatment in an effort to protect the wicker from the cleaners I used.  If you’re thinking that it seems difficult to tape these guys with massive man-hands like mine, you’re correct.

diy eco friendly brass tarnish remover

“Too Hot”

First up, the square bowl.  For this, I mixed a couple of tablespoons of white vinegar with a couple of tablespoons of baking soda.  Just like it would in an elementary school chemistry lesson, the mixture fizzed up and made me feel like a mad scientist.  I didn’t measure exactly, just used enough to make a paste.  I put the mixture on a soft tea towel and buffed the rim in little circles all the way around.  Thirty minutes and a bit of elbow grease later, I was pretty pleased with the results.  Check out how much better it looks than the other two.

diy eco friendly brass tarnish remover

“Too Cold”

This time around I used the juice of half of a lemon and baking soda.  This mixture was also fizzy, but smelled much better than the vinegar mixture.  No measuring involved, I just used enough of each ingredient to make a paste.  I used the same method of dipping a soft tea towel into the mixture and buffing in little circles.  This bowl (granted it’s the largest) clocked in at around an hour and this method took a LOT more effort.

diy eco friendly brass tarnish remover

My hands were cramping so badly by the end, I looked like I was repping some sort of gang.  The results, however, looked much better than the vinegar method.

diy eco friendly brass tarnish remover diy eco friendly brass tarnish remover

“Just Right”

The third and final method was super easy, and produced the very best result.  I cut a lemon in fourths, sprinkled some salt on the lemon and rubbed it around the rim of the small round bowl.  I applied little to no pressure, and in under five minutes, the tarnish disappeared completely and the brass had a beautiful shine to it.

diy eco friendly brass tarnish remover

I did a lil’ bad photoshop to put the before and after together so you can see just how dramatically different the after really is.

diy eco friendly brass tarnish remover

Of course I had to use this treatment on the other two bowls as well and damned if they aren’t one of my favorite $12 purchases in the history of ever.

diy eco friendly brass tarnish remover

And what does a lemon cost, like 10 cents?  My wallet loves me.  I got so excited about the finished product that I started writing this post immediately.  Seriously I haven’t even decided where I’m going to put them yet…  One last bit of before + after action:

diy eco friendly brass tarnish remover

So the next time you’re staring at that tarnished brass whatever in your house, grab a lemon and some table salt and treat yourself to this super simple, satisfying polishing technique!

What are your favorite DIY / eco-friendly ways to clean?  Do tell…