Category Archives: DIY Fashion

DIY Purple Hair

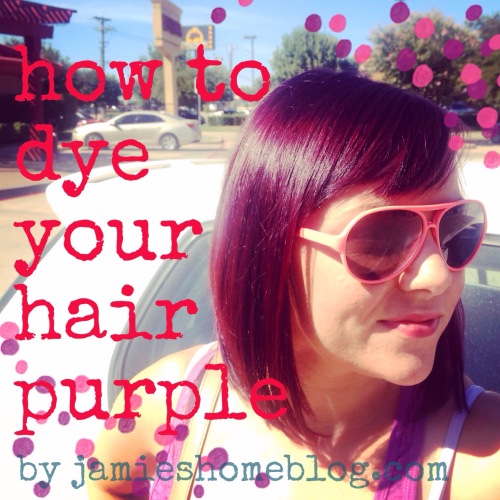
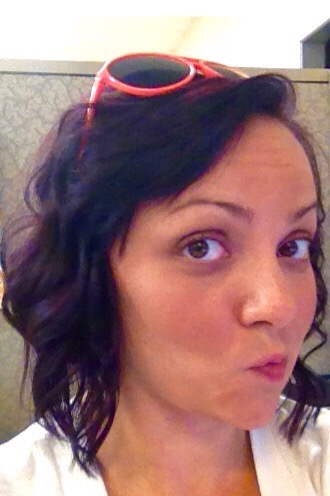
You guys… I recently (finally!) mustered up the courage to dye my hair purple (by myself!) and its causing me to question why my genes ever thought I should be a brunette.

I am obsessed to the point of annoying narcissism; frequently asking my boyfriend what it looks like in different types of lighting, posting selfies on my various social media accounts, and buying clothes that accentuate it’s luxurious vibrance.  This, too, shall pass.

IMG_0606

When I was researching how to turn brown hair purple without bleaching it first, I found some helpful videos and articles online, but no one-stop-question-and-answer-shop.   So here I am writing one out in hopes that it will help someone out there who’s having the same dilemma.  Because I’m totally an expert now that I’ve done it once, right?!

Q: What brand did you use and why?
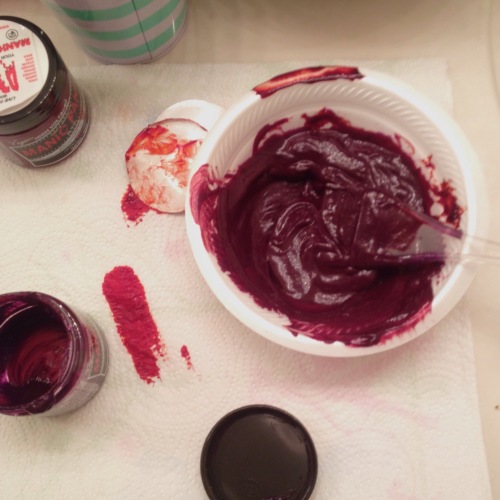
A: Manic Panic, because I had used it when I was younger (90’s kid alert) so I sort of knew what to expect.  I used Purple Haze mixed with just a touch of Infra Red mixed in.  Manic Panic has a ton of color options and bonus – their dyes are vegan and don’t damage your hair.  Mine felt much softer and was much shinier AFTER dying than before.  No, this post isn’t sponsored.

IMG_0339

Q: Would you consider other brands?
A: Sure, but I’m super happy with the results from using Manic Panic.

Q: Is dying your own hair difficult?
A: Not really.  I’ve been coloring my own hair for more than 10 years, so I have definitely found my own rhythm for it.  As long as you’re careful and you prep yourself and your space properly, you shouldn’t have any issues.

Q: Do you need to bleach your hair to dye it purple?
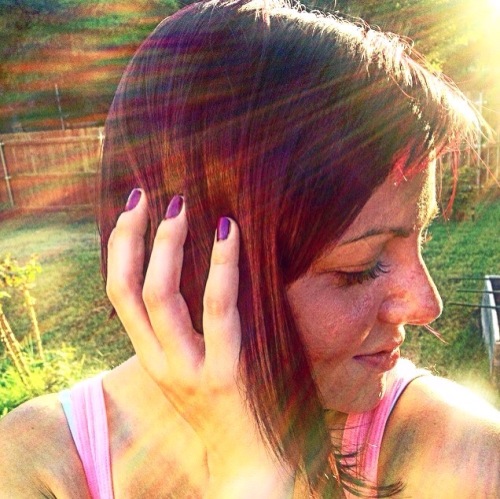
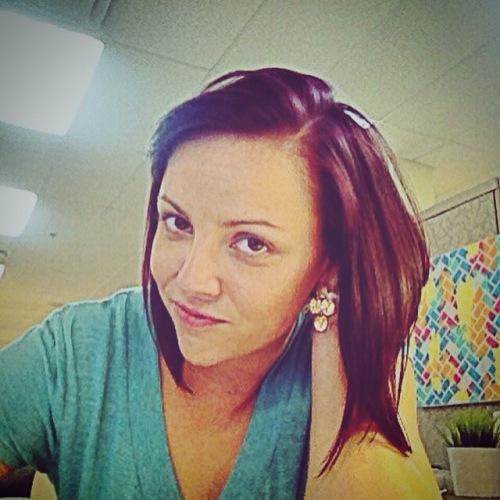
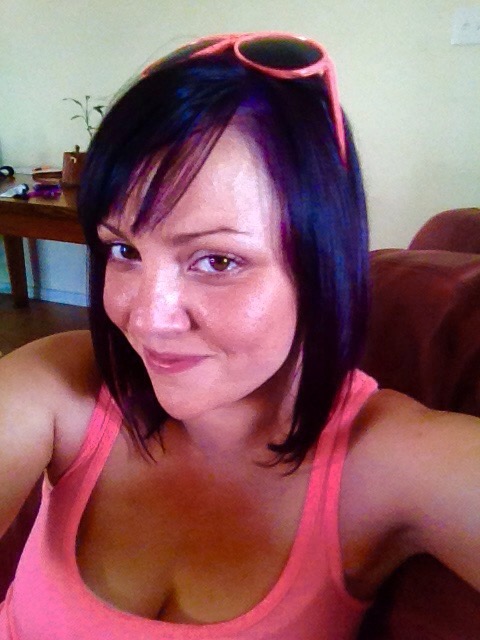
A: Not necessarily.  It depends on what shade of purple you’d like to achieve.  I didn’t want grape bubble gum colored hair (although some people can rock the hell out of it – I’m looking at you, Katy  Perry) so I didn’t lighten my hair at all before the purple.  My hair is naturally dark brown so it ended up with a purple tint to it, which is more vibrant and fuchsia colored in natural sunlight, and takes on a dark violet look in fluorescent light.

IMG_0609 IMG_0410 IMG_0377

Q: Why didn’t you bleach first?
A: Friends, I’ve been 50 shades of blonde in my lifetime, and with how dark my hair naturally is, it’s just too much time and money to maintain it.

Q: Did you apply the dye to “virgin hair”?
A: No.  The last time I dyed my hair (a few months before going purple) I went with boxed dye in a hue a few shades lighter than my natural color.  My hair had only grown about an inch since then, so even though the color had faded, the brown was permanent and still existent on my hair shaft.

Q: What are your best technique tips for dying your hair at home?
A: Protect all the surfaces!  Use petroleum jelly to protect your face, neck and ears from staining (Aquaphor is great for this).  Wear clothes that you don’t give a flip about.  Wear rubber gloves.  Use a dye brush for your hairline and apply to your entire length of hair with gloved hands.

Q: Wait, this stuff stains your skin?
A: Oh honey, so very much.  My entire scalp was BRIGHT purple for the first two days.  It’s unavoidable unless you’re only coloring your ends.  Also, if you’re hair is super long, you may want to wear it up for a day or two while the dye fully sets in. Or just wear a purple shirt!  Matchy matchy!  My hair isn’t even shoulder length so I didn’t have to worry about any transferring.

Q: How long did you leave it in?
A: Two hours.  I told you, my hair is DARK brown.  I wanted to be 100% sure you could see the color.

Q: How long will it last?
A: The dye is semi-permanent so it will last around 3-5 weeks without maintenance.  I’m in week three and there has been some fading, but not much.  In fact I really only noticed some mild fading this morning.  I plan to refresh the color in the next week or two.

Q: Tips on prolonging the vibrance of your color?
A: Say it with me: DRY SHAMPOO IS MY FRIEND.  I only “wash” my hair every other day, sometimes every third day.  I put the word wash in quotes because I don’t actually shampoo.  I recently started using the Wen system, and I am sold on that too.  My hair is EXTREMELY  fine, and I am shocked at how much bounce and shine it has now!  And they’re summer scent, coconut lime verbena… I’d eat it if I didn’t know it was a beauty product.  Again, this post is NOT sponsored.  I just like giving my opinion.

Okay, blogville, those are all the faq’s I could think of.  If you’re thinking of going purple, or any other crazy color, I hope this helps you confidently jump in head first!  Hashtag YOLO, or something like that.  If you have questions that I didn’t address – let me hear them in the comments section!

Alright, I’m off to post more selfies of my lovely locks! #PurpleHairDontCare

IMG_0474 IMG_0355
xo

Advertisement

DIY Halloween Costume: Cliche Instagram Girl

Happy Halloween dudes and dudettes!

I made my own costume again this year and it was the shhh****.

We all have at least one of those friends on instagram.  Posting her pumpkin spice lattes, nutella snacks, selfie after selfie.  In the parlance of our times, a Basic B%!$#.  Calm yourself, I didn’t make up the term.

Halloween is a chance to be someone or something that you’re not.  So I went as a Basic B%!$# Cliche Instagram Girl for Halloween.  And it was cheap, and fast, and easy.  Unlike me.  This costume, for me, required a shirt and a prop.  You ready?

DIY Supplies:

  • Cotton T-Shirt (I used a men’s mossimo size M – so comfy!)
  • Cardboard
  • Spray Paint
  • Letter Stencils
  • Newspaper
  • Foam core poster board
  • Colored “holiday” plastic wrap
  • Tape

First: the outfit.  Skinny sweats, Uggs (faux and borrowed), and DIY’d t-shirt.  I chose the phrase “THAT FILTER LOOKS GOOD ON YOU” for my tee.  Because c’mon, Basics, you know that’s #truth!

The process is pretty straightforward.  I used a little cardboard t-shirt thing to keep my spray paint from leaking through the shirt.  I also used several pages of newspaper to protect my work surface, and to protect my shirt from too much over spray on the other letters on the stencils.

Anytime I do a project that involves lettering, I like to start my stencil or template in the middle of my surface to get things as centered as possible.  This takes some planning since you’re writing things out of order.  I recommend writing your phrase out on paper to use as a reference, just in case.  That way you don’t misspell something and facepalm.  My result with this tee wasn’t 100% centered but the choppy-ness (real word alert) really lends itself to the grungy-hipster-graffiti feel I was going for.

No one needs to see tons o’ progress pictures of how I did it, so I made a fun little gif for you.   You’re welcome, friends!

how to spray paint a shirt

Second: the prop.  What Basic instagram post is complete without a filter and frame, #amiright?!

This part was even easier than the shirt.  I cut a piece of black foam core board into a square and then cut a smaller square into it.  I’m going for the Mayfair filter / frame combo here, Basics.

diy instagram costume diy instagram costume

Then I taped red “holiday” plastic wrap to the back to create those subtle Mayfair pinkish tones we all love.

diy instagram costume diy instagram costume

That’s it, friends.  Done.  Selfie’d.  Grammed.

diy instagram halloween costume


This better win me a PTO day at our costume contest at work…

Pro Tips:

  • Don’t get offended by this blog post if you’re guilty of Cliche Instagram Girl posts.  This costume is a satire and I am most certainly guilty of some of the Basic Behavior I’m poking fun at.  See: pic in top left-hand corner.
  • Use Valspar flat spray paint.  They have that “any angle” spray can, which is ideal when you’re working on a flat surface and need to spray from directly above.
  • When you’re done spray painting your shirt with whatever design, use newspaper edges and your paint to create a look of over-spray on a large stencil.  It makes the whole thing more cohesive.
  • Wear disposable gloves or get spray paint on your hands.  Your choice.
  • Treat yourself on Halloween.  I’m not much for candy so I’m going with an adult bev or four.
  • Boo!

xo

DIY Bangle Bracelet Inspired by Kate Spade Saturday

When I buy scarves, I always keep the ring they come on…  The process happens something like this:  I get home (probably from Target) with my spoils, take the scarf off of the ring it hangs on, put the scarf on and cheese at myself in the mirror, put the ring around my wrist and think “I bet I could make a really cute bangle out of this scarf ringy-thingy”.  True story.  So I totally did that.

diy bangle bracelet inspired by kate spade saturday

My inspiration came from Kate Spade’s Saturday line.

diy bangle bracelet inspired by kate spade saturday

IMAGE SOURCE

This bracelet is the bees knees you guys.  I had to put my spin on it.

I grabbed a couple of coordinating fabrics from my stash.  The solid mint colored fabric is actually part of a twin sheet I bought at a local thrift store for 50 cents!  I bought an absurd amount of the flowery fabric at a last chance rate of about 70c per yard.  I’m not even a flowery fabric person, y’all.  It just spoke to me.

diy bangle bracelet inspired by kate spade saturday

I used part of the hem on the sheet to save myself a step.  That step was folding and ironing, which I did with the flowery fabric.

diy bangle bracelet inspired by kate spade saturday

Once I had ironed a nice crease into my flowery fabric, I sewed both pieces together, the flowers overlapping the solid mint.

diy bangle bracelet inspired by kate spade saturday

In case you’re wondering, my sewing machine is older than me (by about 20 years) and works like a velvety chocolate dream.  It’s a Singer 237 Fashion Mate, and along with sewing skills, its one of the best gifts my mother ever handed down to me.  It doesn’t do all the fun things that newer machines do (like fancy stitches and embroidery) but it’s utilitarian value can barely be measured.  I’ve made curtains, purses, shirts and several pillow cases with her in the few short years since my mother gave her to me, and I used it for countless other crafts growing up.

diy bangle bracelet inspired by kate spade saturday

diy bangle bracelet inspired by kate spade saturday

Moving on… Once the two strips were sewn together, I wrapped them around the ring, putting a dab of Alene’s fabric fusion on the inside of the ring with each wrap.

diy bangle bracelet inspired by kate spade saturday

There isn’t really a seamless way that I can find to seal it off, so I just wrapped and trimmed the end as cleanly as I could, put a healthy dab of fabric fusion on and clipped it with binder clip to make it stay put while it dried (about two hours).

diy bangle bracelet inspired by kate spade saturday

I love the way it turned out.  Hashtag arm party, y’all.

diy bangle bracelet inspired by kate spade saturday

I actually ordered a Kate Spade one as well, half because its so cute and half because there’s a good cause behind it.  You can read more about the cause on Saturday.com.  They didn’t sponsor this post, btw (calling Kate Spade, please sponsor my posts lol) they were just my inspiration and I thought the charitable aspect was worth mentioning.

Anyone else out there diying cute jewelry?  Do tell…