Tag Archives: diy

new site, who dis?

Hi, friends! I haven’t been posting here lately, mostly because my fiance and I are busy working on our biggest DIY project yet, Rosy the Argosy! Rosy is a vintage Airstream camper that we are renovating, and we’ll eventually move into her full time to live a more minimalist, purposeful lifestyle. I am keeping jamie’s home blog active so I can come back and post here when I do projects, but my new internet home is www.teamjamavick.com. At #teamjamavick, Arnavick and I will be sharing DIYs, renovation posts, crafts, tiny living and travel stories, and more. Hope to see you there, and thanks for visiting my little corner of the internet!

xo,

Jamie + Arnavick

teamjamavick


Advertisement

Spray Painting Tips and Tricks

Hi friends.  I have joked before that I’ll spray paint anything that holds still long enough.  While that’s a bit of an exaggeration, a big chunk of my projects and my posts here on jhb involve spray painting, so I figured I’d share my best tricks and tips with you guys!

*This one is obvious, but, always read and follow the manufacturer’s instructions on the can!  Not all spray paints are created equal, and they can behave differently depending on the brand, finish, and even the climate you’re in.
*Make sure your object is spray-paintable! The instructions on your spray paint can will tell you what surfaces it’s designed for.
*Shake, shake, shake!  Make sure you shake the can until the ball rattles and then for another two minutes to make sure that everything in the can is thoroughly mixed together.  My arm gets tired when I do this but skimping here can mean a gloppy, uneven mess.  Ick.
*Protect yourself!  I always wear gloves (can’t be messin’ up my mani), clothes I don’t care about, and a dust mask.  I don’t want to breathe in paint particles, and neither should you.  It’s plain bad for you.
*Prep your surface!  Plastic drop cloths are very cost effective, and can usually be re-used many times if you take proper care of them.  I always lay a drop cloth on my work surface, and if there’s a light breeze going (a luxury here in North Texas), I protect items around me from overspray with an additional drop cloth.
*Take it easy!  Use a light trigger finger on that spraypaint can to avoid a gloppy, drippy mess, friend. It should take at least three light coats to get full coverage with spraypaint.
*Move swiftly!  Quick, even strokes (paired with the light trigger finger) make for beautiful coverage and a smooth finish!
*Paint at your own risk…  Guys, I’m an amateur home diy-er.  I have a lot of experience, but I am not licensed, and I am not a professional.  Everything I write on this blog is an account of, or based upon an experience of my own.  If you don’t feel comfortable using spray paint, tools or anything else, consult a pro first, okay?

I hope these tips are helpful to all of you in diyland!  Here are some of my spray paint projects:

Post links: green mirror | gold mirror | instagram t-shirt | gold metal and glass console | pattern top accent table | coral frames

Do you have any tips, tricks or warnings about spray painting?  Holler at me in the comments!

Concealed Media

The title of this post totally sounds like a name of a production company or cheeky pop-punk band, no? #randomthoughts

concealed media storage

I crossed something off of my to-do list!  Crossing things off of lists is really satisfying, wouldn’t you agree?

It also satisfying for me when I fix something that irks me.  I love playing Nintendo and watching DVDs, but it irks me to have media visible.  It’s just too busy to be visually attractive.  I store all of my media in this beautiful scandinavian-style cabinet, which I adore, but I had to do something about the fact that you can see inside.

concealed media storage

I have several options in my craft stash that would look nice behind the window panes of these cabinet doors – scrapbook paper, cork, mountains of scrap fabric.  I ended up going with textured, paintable wall paper that I had leftover from a dresser redo (my first post on the ol’ blizzog!)

concealed media storage

I measured posterboard panels that overlapped the glass panes by about an inch.  Because my cabinet doors were longer than the length of one piece of posterboard, I cut a few pieces at the right width and taped them together.  High tech stuff.

concealed media storage

I attached my wallpaper to these panels using mod podge instead of the adhesive thats already on the back of the paper, because the former is much less messy and time consuming than the latter.

concealed media storage

concealed media storage

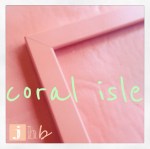
I still have about two-thirds of my sample pot left of Valspar Greek Tapenade, which I used for my Instax photo display shelf. Why did I choose to use it for this project, too? I. LOVE. THIS. COLOR. SO. HARD.

concealed media storage

I used this same paint on my “FRIENDS” style picture frame around my peephole (see below pic), and I have other plans for it as well. Sometimes those little samples go a long way!

inexpensive small space decor

Once the paint was dry (two light coats), it was time to affix it to the inside of the cabinet doors. Guys, this part was so easy… I used double sided tape.

concealed media storage

The best part? They aren’t permanent, so if I change my mind (entirely possible), I can pull them down lickety split!

Doesn’t it look much better now that you can’t see my collection of horror movies and every Nintendo system ever made?

Do you prefer to conceal your media items, or do you like leaving them out in the open? Let me know in the comments!

Blogiversary: Two Years!

Dudes, I’ve been making things my whole life, and I’ve been writing to you about them for two whole years now. Thousands of people have visited my little corner of the internet from all over the planet. I cannot begin to express my gratitude for this entire experience. It’s one of the most emotionally rewarding hobbies I’ve ever had.

I owe everyone that’s ever visited, commented and shared my posts a thank you and a big bear hug! You guys are awesome!

I’ve got some projects in the works right now, which have been delayed because life happens, but in the meantime… Here are a few of my favorite little projects from the past year.

DIY Hanging Canvas Headboard
String Art
Leaning Instax Picture Display Shelf
Upcycled Colander to Patio Planter 

Cheers!

xo,

J