Category Archives: Home Decor

A Curtain Of Sorts

I recently completed a pretty big project that I’m totally obsessed with.  I’m gonna give it to ya in two posts though, so you’re not stuck reading a one thousand word diy essay, k?  Lets talk about how to sew curtains.

how to sew hidden tab top curtains

Supplies:

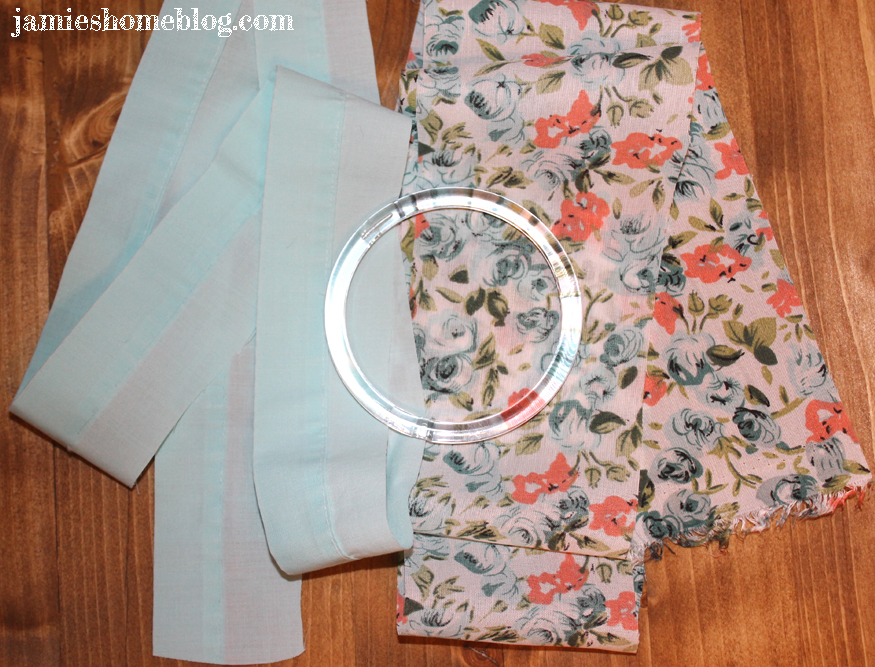
  • Blue Hawk 9′ x 6′ canvas drop cloth
  • Iron / ironing board
  • Sewing machine
  • Thread
  • Fabric scissors
  • Yardstick
  • Binder clips
  • Seam ruler (not necessary but certainly helpful)

I wanted this curtain to be floor-to-ceiling, and my ceilings are 8′ high, so the first step was to trim this guy down.  I also wanted it to be just under 4′ wide.  So I measured 4′ feet from the long side at both the top and bottom edges, folded it over and clipped it in place using binder clips.

how to sew hidden tab top curtains

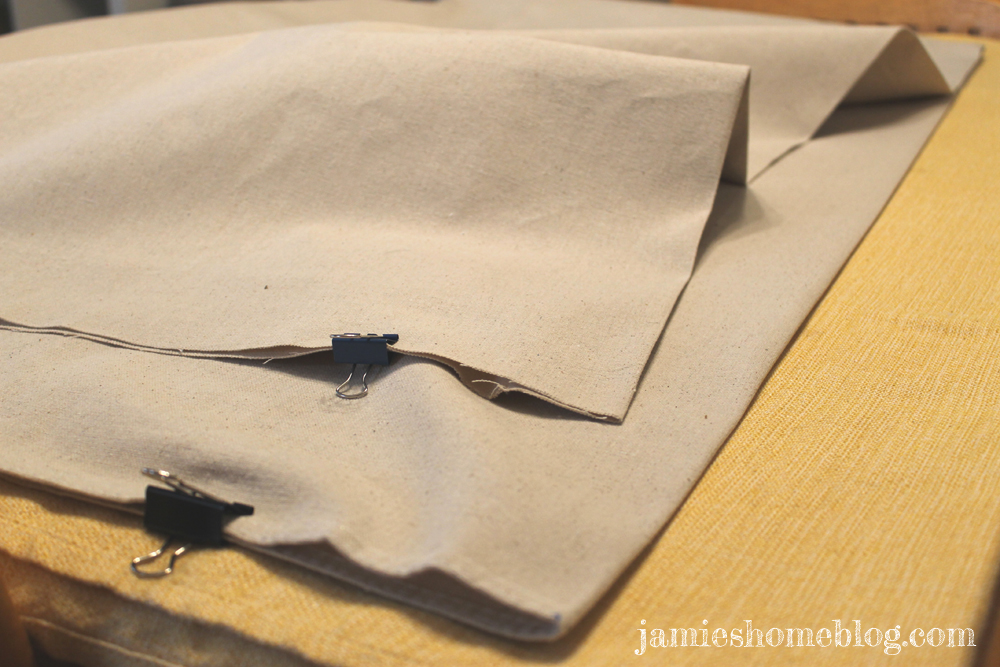
I then ironed a line down the length of the curtain and used that as my guide to cut the fabric as straight as possible.

I repeated the process across the width by making a fold, clipping with binder clips, ironing and cutting across my ironed line.  I went with 8′ 1″ so that once it was hemmed it would be down to 8′.

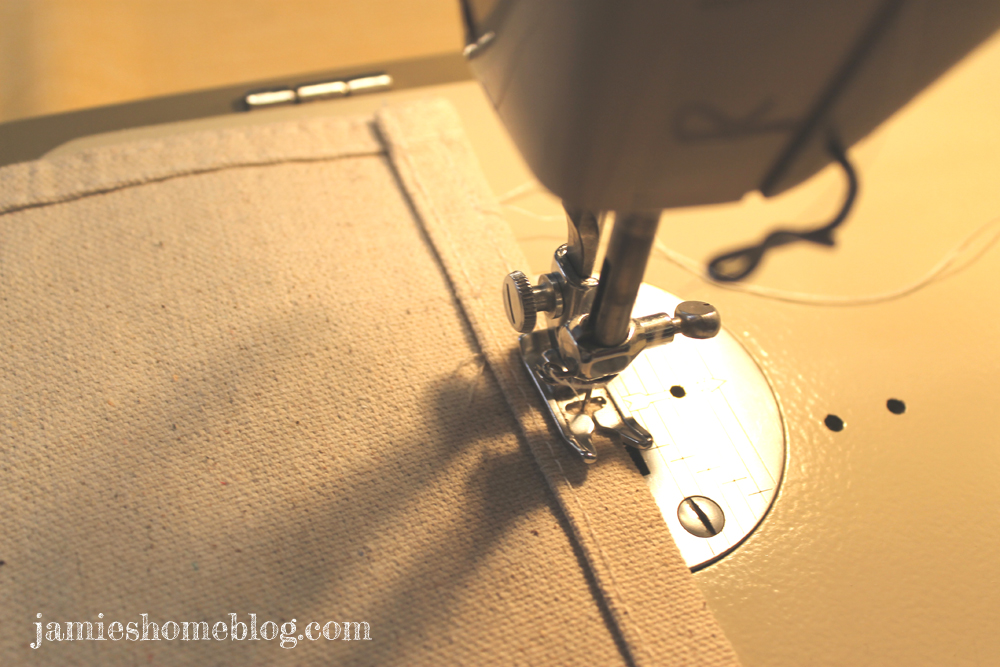
For the side hem, I used a seam ruler to iron a 1″ fold along the length of the canvas.  I then folded it within itself, resulting in a 1/2″ fold.

how to sew hidden tab top curtains

Then the side got a double stitch hem all the way down.  I used a needle and thread in my sewing machine specifically designed for heavy weight fabric.

how to sew hidden tab top curtains

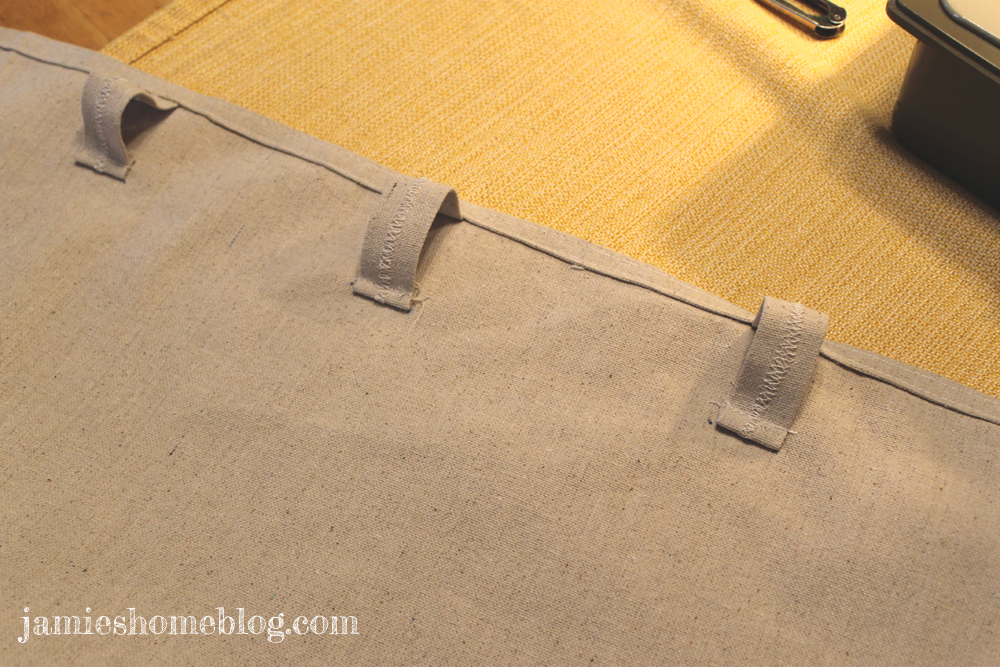
The hem along the width would serve as the top of my curtain.  I prefer hidden tab-top curtains.  I just like the way they look.  The process to make them is a bit more tedious but the juice is worth the squeeze if you ask me.

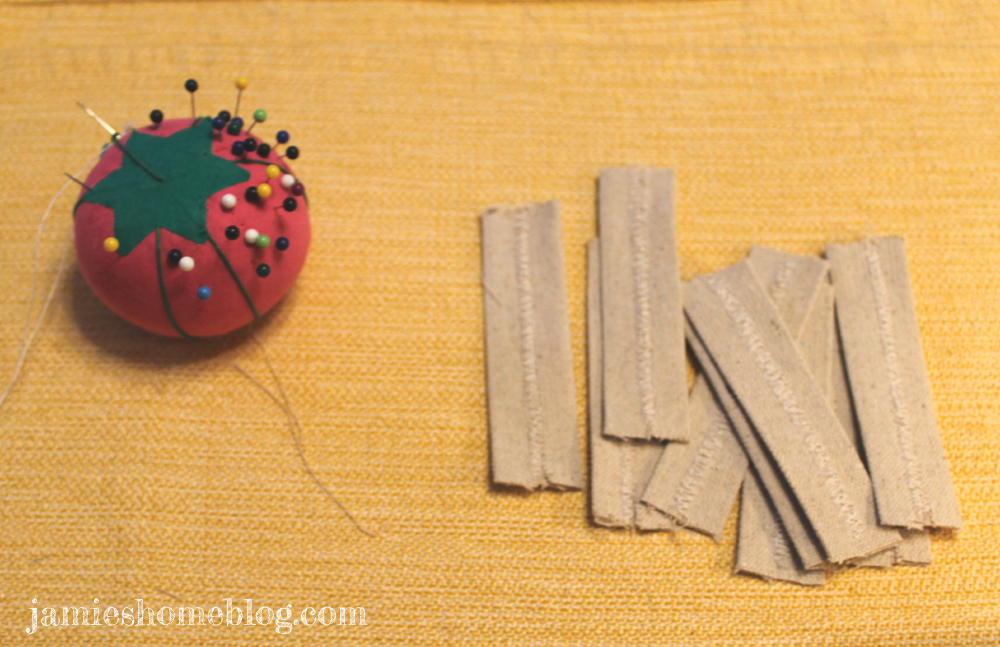
For my tabs, I cut nine 2″ x 4″ rectangles out of my canvas scraps.

how to sew hidden tab top curtains

I folded the long edges into the center and ironed.

how to sew hidden tab top curtains

And then used a zig zag stitch down the middle for added sturdiness.  This left me with nine 1″ wide, 4″ long strips.

how to sew hidden tab top curtains

how to sew hidden tab top curtains

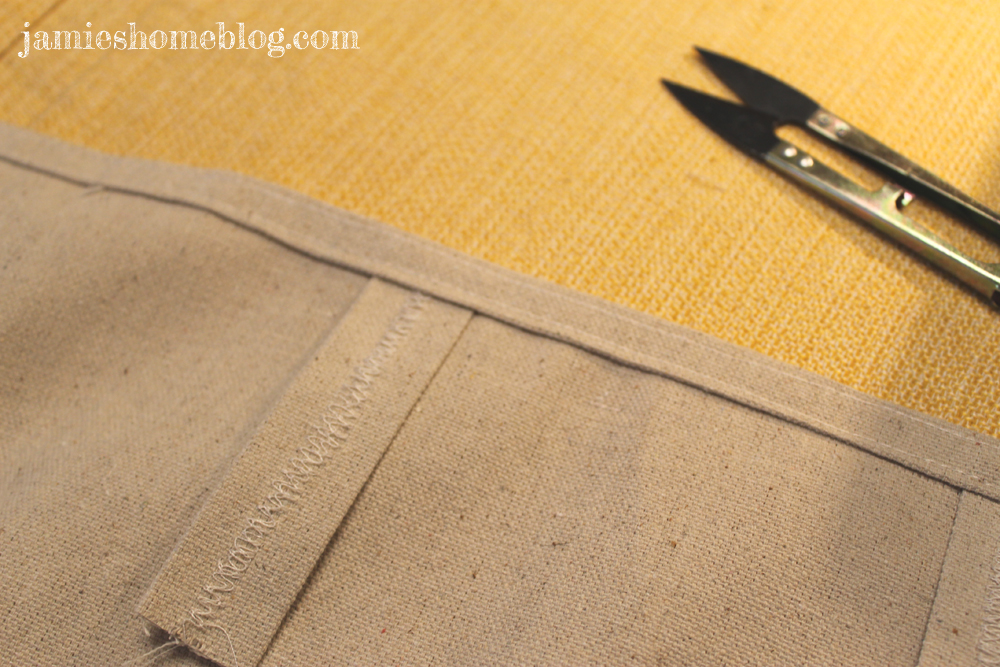
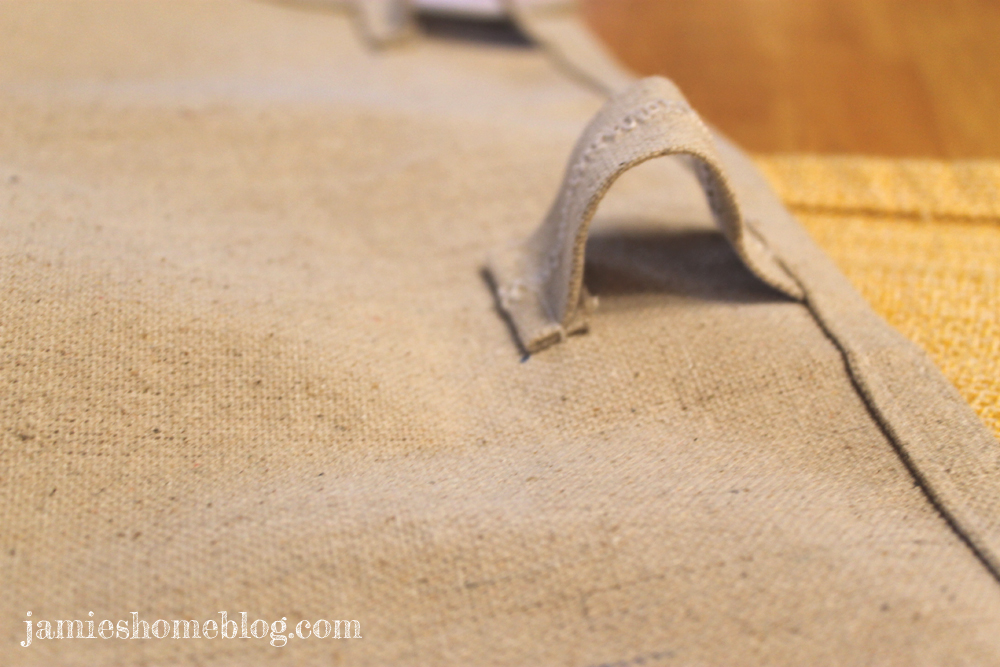
Using the same folding and ironing technique as I used on the long side of the curtain, I prepared the top to be hemmed, but before I double stitched it, I tucked each of my 1″ wide tabs under the fold, about 4 1/2″ inches apart.

how to sew hidden tab top curtains

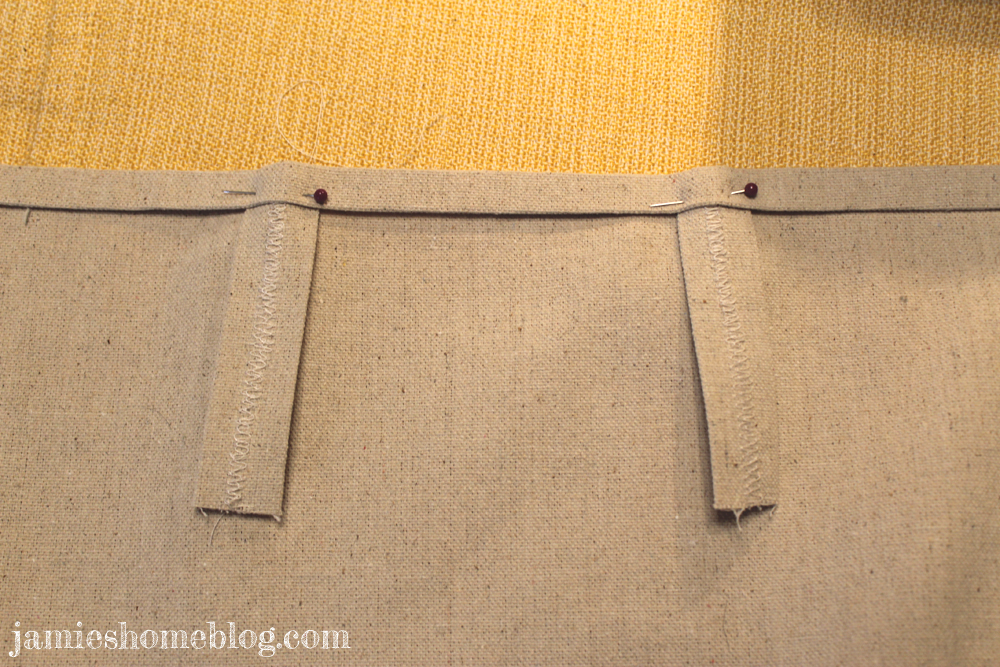
Then the tabs got double stitched into the top hem.

how to sew hidden tab top curtains

I folded the bottoms over and stitched them in about an inch and a half below the top hem so that I could slide a dowel rod through like so.

how to sew hidden tab top curtains


how to sew hidden tab top curtains

how to sew hidden tab top curtains

And voila!  I turned a $10 canvas drop cloth into a curtain of sorts.  I’ve used this method on several different fabrics for curtains for friends of mine and it works like a charm every time.

Stay tuned to find out how I used this curtain!  Hint: it’s not over a window.

Do you like to sew your own curtains or do you prefer to buy them?  Do tell…

Project Arrested Development

Anyone who has known me personally for more than a half-hour probably thinks that this post centers around what I deem to be the best television show in the history of ever (based upon the post title).  Put down your forget-me-now’s hermanos, because that is most definitely not the case.

Here’s the story of some old film rolls, that were lost for 14 years, and the one girl who had the guts to develop them.  Its… Project… Arrested Development!

developing old film

The back story here isn’t complicated – I had several rolls of film and disposable cameras sitting in a box for about 14 years.  I consulted a coworker (who is also an accomplished photographer) on whether or not they could be developed.  She told me as long as they weren’t exposed to harsh elements that I should go for it.

I went for it.  With a few of the rolls, that is.  Two of the disposable cams had exposures left on them, so I’m using them up now to see if I can get some cool fades / light leaks on the pics I take.  I’m sure I’ll post about that at some point.

Anyway, the real humor in this story, friends, is that even 14 years ago I seemed to have a propensity to curate my environment and preserve its memory in photographs (hey, just like I do on this blog!).  I feel like I’ve maybe improved, even if just a little.

I now present to you my room – at age 15.

Here’s the entry.

developing old film

You can’t see it?  Let me bring you in closer.  This is where my friends wrote all kinds of notes to me.  An analog “facebook wall” of sorts…

developing old film

And no wall is complete without photos… and pockets from jeans that are hopefully no longer being worn.

developing old film

Stickers are so en vogue…

developing old film

As is Freddie Prinze Jr…

developing old film

But lets actually move into the room, shall we?  Hey Jame, I think your finger is on the lens…  Wait is that Freddie Prinze Jr again?

developing old film

Here’s a weak wide angle of my bunk beds… Please make sure you notice the HUNDREDS of Beanie Babies on the shelf… (it was the late 90s, early 2000s… what?!)

developing old film

Hello wall gallery… I think I see someones faaaavorite band in there!  Also – fun fact – I still own that trunk table!  And it still looks the same as in this picture.  BAD DIYer, BAD!

developing old film

Oh in case you guys didn’t know, I like Blink-182 a little bit.  I almost typed “used to” in that last sentence haha…  I don’t like lying to you guys.

developing old film

And seriously, did I put a bumper sticker on a perfectly good wood dresser?!  For shame.

No teen room is complete without a desk at which you never always did homework, right?  Please direct your attention to the top right hand corner of the below photo, wherein you’ll find a cartoon I drew of me and my future husband, Mark Hoppus of Blink-182.

developing old film

Oh and because I’m not finished having a sense of humor about my 15 year old self, here’s me that next Christmas, where I received tube lights to hang over the whiteboard I got (both of which I relentlessly begged for).

developing old film

And the whiteboard?  Well I wanted to make sure EVERYONE got a sweet, sincere Christmas message as the first thing I wrote on it apparently…

developing old film

Pure class.  Stick that in your #TBT and smoke it.  I’ve got more pics of my bedroom after we painted over the green and the wall writing (but not over my Blink posters!)… but those are for another day.

Have you ever developed an old roll of film?  Did your parents let you scribble on your walls?  Are you a fan of ARReSTeD DeVeLOPMeNT?  We should be friends… Do tell…


DIY Glass Magnets

Recently, the fella and I spent an afternoon at Main Street Days in Grapevine, TX with a couple of our finest friends.  I do love a festival.

While we were there, we visited Vetro’s shop.  They’re a glass blowing studio based right there in Grapevine’s historic district.  They had some really cool stuff (we were particularly fascinated and creeped out by their seriously realistic glass eyeballs), but the fella and I only walked away with a couple of cool looking glass “shards”.  They were actually scraps / runoff from various blown glass projects the artists made.

They’re the perfect size for magnets!

diy glass magnet

To make your own magnets out of glass “shards” (not the sharp kind, please) or glass beads or glass somethings, all you need are magnets, your glass and E6000 glue.

diy glass magnet

Make sure you follow the E6000 instructions carefully.  They say to start with a rough surface, and the backs of my glass shards had tiny pockmarks in them, so that worked out well.

diy glass magnet

The glue comes out really fast when you first open the package (maybe because the contents have been under pressure? not sure).  Make sure your work surface is protected.  This stuff smells too, and the fuminess lingers, so if you’re sensitive to that, open a window and maybe wear a dust mask if that’s your thing.

The E6000 should sit for about a minute or so before you put your magnet on.  Once my magnets were in place, because I had so much excess from the glue coming out of the tube too quickly, they slid off center a few times.  I sat with them for about ten minutes to move them back into position when they slid too far, and after those first ten minutes the glue had hardened enough to where the magnets stayed put.

diy glass magnet

I let them cure for 24 hours and then they were ready to stick to the fridge!  If you know where my grocery list came from we can be friends, k?

diy glass magnet

Also, yes I positioned them in the above picture to look like two colorful dolphins giving kisses.  Don’t judge.

Did anyone else hit up Main Street Days?  We had a particularly pleasant time in the Craft Beer Experience tent.  What crafts have you guys been doing lately?  Do tell…

DIY Bangle Bracelet Inspired by Kate Spade Saturday

When I buy scarves, I always keep the ring they come on…  The process happens something like this:  I get home (probably from Target) with my spoils, take the scarf off of the ring it hangs on, put the scarf on and cheese at myself in the mirror, put the ring around my wrist and think “I bet I could make a really cute bangle out of this scarf ringy-thingy”.  True story.  So I totally did that.

diy bangle bracelet inspired by kate spade saturday

My inspiration came from Kate Spade’s Saturday line.

diy bangle bracelet inspired by kate spade saturday

IMAGE SOURCE

This bracelet is the bees knees you guys.  I had to put my spin on it.

I grabbed a couple of coordinating fabrics from my stash.  The solid mint colored fabric is actually part of a twin sheet I bought at a local thrift store for 50 cents!  I bought an absurd amount of the flowery fabric at a last chance rate of about 70c per yard.  I’m not even a flowery fabric person, y’all.  It just spoke to me.

diy bangle bracelet inspired by kate spade saturday

I used part of the hem on the sheet to save myself a step.  That step was folding and ironing, which I did with the flowery fabric.

diy bangle bracelet inspired by kate spade saturday

Once I had ironed a nice crease into my flowery fabric, I sewed both pieces together, the flowers overlapping the solid mint.

diy bangle bracelet inspired by kate spade saturday

In case you’re wondering, my sewing machine is older than me (by about 20 years) and works like a velvety chocolate dream.  It’s a Singer 237 Fashion Mate, and along with sewing skills, its one of the best gifts my mother ever handed down to me.  It doesn’t do all the fun things that newer machines do (like fancy stitches and embroidery) but it’s utilitarian value can barely be measured.  I’ve made curtains, purses, shirts and several pillow cases with her in the few short years since my mother gave her to me, and I used it for countless other crafts growing up.

diy bangle bracelet inspired by kate spade saturday

diy bangle bracelet inspired by kate spade saturday

Moving on… Once the two strips were sewn together, I wrapped them around the ring, putting a dab of Alene’s fabric fusion on the inside of the ring with each wrap.

diy bangle bracelet inspired by kate spade saturday

There isn’t really a seamless way that I can find to seal it off, so I just wrapped and trimmed the end as cleanly as I could, put a healthy dab of fabric fusion on and clipped it with binder clip to make it stay put while it dried (about two hours).

diy bangle bracelet inspired by kate spade saturday

I love the way it turned out.  Hashtag arm party, y’all.

diy bangle bracelet inspired by kate spade saturday

I actually ordered a Kate Spade one as well, half because its so cute and half because there’s a good cause behind it.  You can read more about the cause on Saturday.com.  They didn’t sponsor this post, btw (calling Kate Spade, please sponsor my posts lol) they were just my inspiration and I thought the charitable aspect was worth mentioning.

Anyone else out there diying cute jewelry?  Do tell…

Hablas Español? Parlez-vous Français?

Baxter!  You know I don’t speak Spanish!

Actually, I do speak a small amount of Spanish and an even smaller amount of French but I think we all know what si and oui mean, no?

Here’s a cute little rustic sign I made for my Wall of Wanderlust.

diy rustic wood sign

When I made my mid century nightstands (more on that here), I used a wood scrap to color test my Danish Oil.  It sat in my scrap pile for months, until I got a wild hair to make it into a little sign.  One of those use what ya got projects, ya feel me?

diy rustic wood sign

The process here is pretty basic.  I used a sponge pouncer with white acrylic paint over a stencil to paint my letters on my scrap wood.

diy rustic wood sign

Here’s a fun little gif of the process.

diy rustic wood sign

To speed up the drying process since my stencils had to overlap, I used a hair dryer on the cool setting to dry each letter for about a minute.  As you can see in the gif, I used some washi tape to hold each letter steady while I dabbed my paint.

Then I painted the sides white, since there was a bit of finish overlapping onto them.  After doing the top side, I taped down the rest of the sides to make my lines more crisp.  I don’t have the steadiest of hands, guys.

diy rustic wood sign

diy rustic wood sign

Since the sides were bare, dry wood, they only took a few minutes to dry.  I flipped the board over and attached a sawtooth hanger (after measuring and marking the center of my board).

diy rustic wood sign

diy rustic wood sign

Then a quick tap-tap with my hammer and a nail on my wall and boom, this guy was right at home on a wall with French and Spanish postcards and maps and stuff.

diy rustic wood sign

I may decide to seal it at some point with polycrylic or something similar, but I kind of like the matte look it has.

Not bad for a little hour-long “I’m bored” project on a Sunday morning, oui?

Anyone else making multilingual wall art?  Por favor dime…