Tag Archives: wall art

Worldly Wall Art – Part I

I’m back after a bit of a hiatus, folks.  And I am mega excited about some of the things I’m working on right now.  One of them is the wall above our sectional.  I mentioned once that I had a few empty frames hanging there…  If I’m keepin’ it real (and you know I am) I’ll tell you that these four 8 x 10s hung in this position for about eight months!

Travel Wall Art Gallery

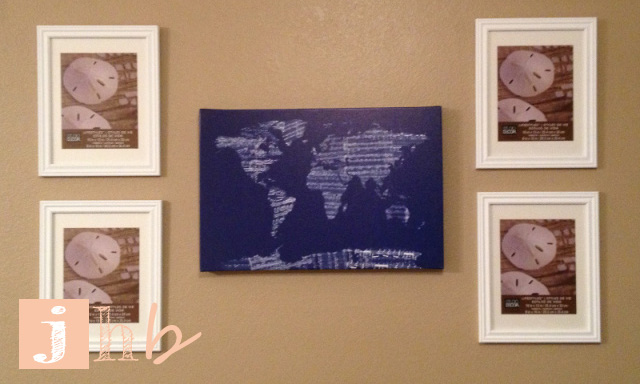
Yep.  We looked at four framed stock photos of sand dollars for THAT. LONG.  Shame, shame Jamie.  Sidebar – how cool is the world map the frames are surrounding?  Check out the detail on that bad boy!

Michael Thompsett Map

The countries are made up of sheet music!  The art is by Michael Thompsett.  I originally bought it on Hayneedle’s flash site The Foundary but his work can be found here on Hayneedle, among other places, and they’re all so pretty!  I liked it so much that I also bought the dinosaur one for my dino-enthusiast sister.

It would be prudent to note that my posts aren’t sponsored by Hayneedle or Michael Thompsett or anyone else – I just write about things I love/places I shop.  

Back to the frames.  Even though I didn’t have anything to put in them (evidently for eight months), I had to snag them.  They were on sale at Michael’s for $5.98 each!  Once I hung them around the map, I bookmarked my brain to keep an eye out for maps, skylines or anything “place-related” that would work in the frames.  Eight months later (have I mentioned the length of time that the frames were naked yet?) my June Birchbox subscription treated me to some super cute postcards!  Each one depicts a different major city and says hello in that particular city’s language.

Birchbox Wanderlust Postcards

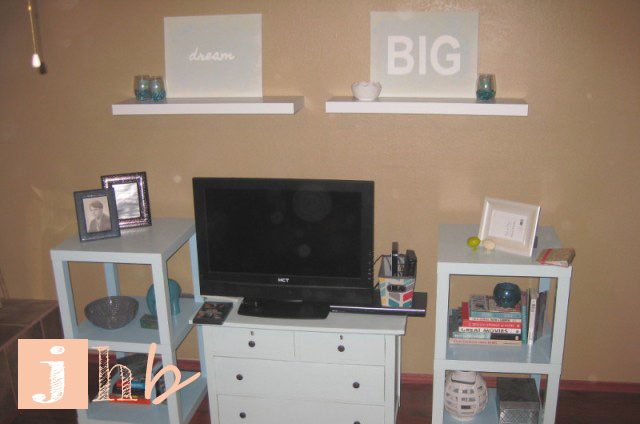
And aren’t the bright colors so fun?!  I switched the layout of the frames since the designs on the card are landscaped.  To mount them, I just flipped over the sand dollar stock pics, measured where I wanted the postcard and secured it to the backs of the stock pics with a bit of tape – easy peasy!  I recently made a purchase that I’ll be adding to this wall later in the week.  Stay tuned for that.  For now, here’s what we look at right before we plop our bums down on the sofa (dog included).  Much better than before, no?

Worldly Wall Art

I’d say not bad for $20 in frames and free postcards!  I’m still on the lookout for some curtains that I love to cover our super 80’s blinds – ah the thrill of the search!  I’d also love to paint the walls but that may take some convincing with the landlord.  We shall see!

Any other Birchboxers out there that loved their Wanderlust postcards as much as me?  And who else has let empty frames sit for months on end?  I know I’m not the only one… Do tell…

dream BIG

Here’s a story about a finishing touch. I’ve blogged about my media stand and the shelves I constructed out of inexpensive IKEA tables. Now it’s time to talk about the last bit I did to finish off the media area. Although I never really consider any area of our home “finished”. Our living space is ever-evolving!  Check out the media area as I last left it here in blogland (please excuse my horrible photoshop job over the tv screen).

DIY Media Stand

I mentioned once before that the media stand lives on a massive wall, and believe me that is not an exaggeration. The main wall in our front room is 11.25′ tall by 18.5′ wide. That’s a LOT of wall. Over 208 sq ft of wall to be exact. See, this wall comes down from the peak of the roof on our condo. I knew I wanted something to frame out the area over the TV and give character to the big empty “canvas”, I just wasn’t sure what…

I knew I didn’t want to hang a mirror. I have frames (that are still empty!!!  need to get on that…) and a world map hung on the opposite wall and I didn’t want the reflection to compete with whatever we happen to be watching on TV. Fun fact – you can usually find us watching Arrested Development (with which the fella and I have an unhealthy obsession), Arrow, Undercover Boss, Master Chef or trying to find out who the gal with the yellow umbrella is. We love Netflix and Hulu. Cable Schmable. Who needs it.

Back to the wall… After much careful deliberation I decided that artwork on a floating shelf would be a delight of a sight above the tv. I love all of the typographical artwork that peppers my Pinterest feed.  And artwork atop a shelf above the tv was just the thing to add height to our little setup.  I have been known to sketch out my plans.  Not to scale or anything, I just like to put pen to paper to help visualize what I want my end result to look like.  Fancy, no?

Sketch of media stand idea

And then it was off to Hobby Lobby I went, where thanks to a sale and my coupon from the HL phone app, I scored a two-pack of 16″ x 20″ canvases for a pretty nice price (I think it was around $8). I have oodles of acrylic paint in my craft stash, so I picked a blue that was similar to my shelves and media stand and a soft green that resembled my jade-colored frame gallery (I’ll have to show that off on here at some point).

Acrylic Paint Colors

I went for a “washed” or “water colored” effect by mixing about one tbsp of paint with a few oz of water. I just squirted the paint right into a little jar, screwed the lid on tight, and shook it like crazy until it was mixed.

There was no method to my painting madness – I just slathered the stuff on with a little coarse bristle brush until I liked the look of it.

Wash Painting

After one coat of green and one coat of blue these canvases were asking for more. So I gave them some wispy, whimsical squiggles courtesy of some leftover yarn in my stash.  I soaked the yarn in the blue paint mixture for a few minutes and then laid it haphazardly on the canvases to create the squiggly lines.  I then let them dry for around 24 hours.

yarn

Then it was time for the fun part – the wording!  “Dream big” is a serious statement.  It serves as a reminder that we can definitely accomplish great things if we dream big enough and stay focused on our goals.  It’s just the kind of encouragement I want to look at every time I walk in my front door.  I went with a cursive font for the word dream and “impact” for the word BIG.  I simply printed them out on paper and traced them on to my Martha stencil film, then cut the words out with my handy-dandy Xacto.

Stencil - Dream

Martha Stewart vinyl stencil paper.

The stencils were carefully adhered to the canvases and I went to town with plain white acrylic paint.  I had to keep little segments on the stencil on the d, e, a and b so that I could keep from painting the inside of the loops.

Stenciled Words

As soon as the words were painted, I carefully peeled off the stencils while they were still wet to keep the edges from peeling.  Then I painted over the areas where my strips were to close my letter loops and let the canvases dry for another 24 hours.

Wall Art - Words on Canvas

As for where these beauties hang out now, I bought two white 48″ floating shelves and mounted them to the wall according to the instructions.  This took a lot of measuring, drilling and screw-driving, which my handsome fella was so gracious to help me with.

Mounting Shelves

I set my newly made artwork on the shelves with a few miscellaneous decorative items (they’re designed to hold around 30lbs each so I didn’t want to load them up crazy style).

Media Stand Entertainment Center DIY

As for this “finishing touch” on our media area – I’m in love!  It’s so nice to glance up there and get a little inspirational shot in the arm on the regular!

Any other folks out there jazzing up massive walls with homemade art, floating shelves or any other fun items?  Do tell…