Category Archives: DIY

DIY Eco-Friendly Brass Tarnish Remover

In my recap of my visit to Ft. Worth Vintage Market Days, I ended with a little teaser as to what the third and final item was that I purchased at the event.  If you guessed that it was the brass clock…

Fort Worth Vintage Market Days

You’d be close, but wrong.  I reeeeaallllly wanted that clock, but they were asking well more than I wanted to spend.  The brass-rimmed wicker bowls, however…

Brass and Wicker Bowls

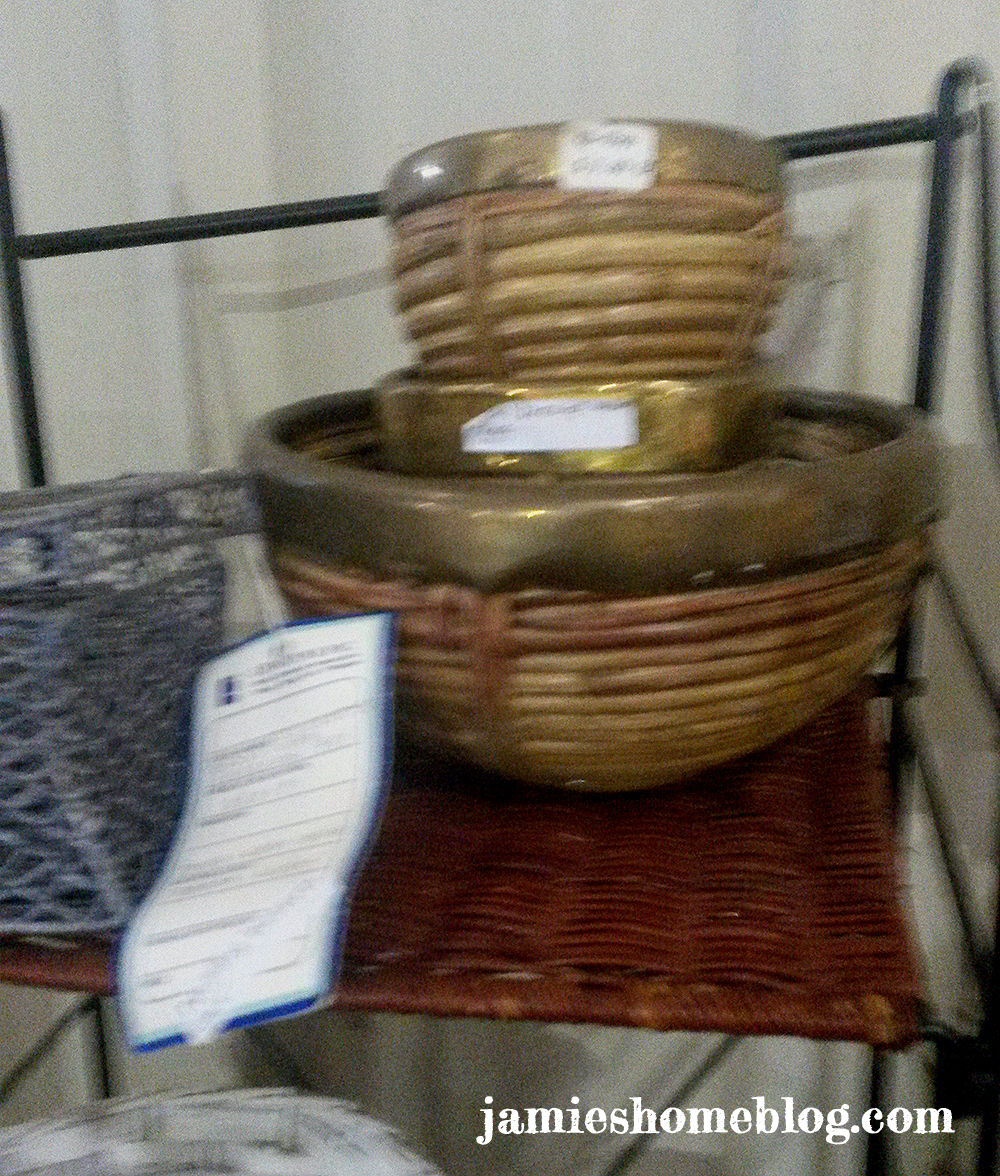
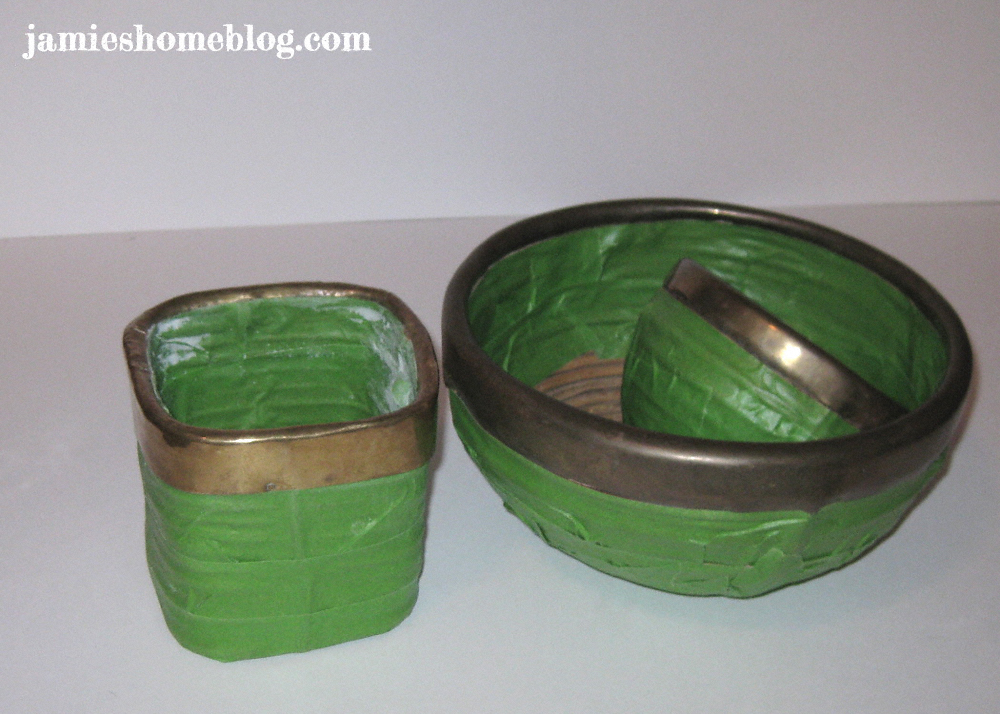
Were priced oh so right.  Here’s a better (non-phone-in-dark-lighting) picture of them.

diy eco friendly brass tarnish remover

They were marked at around $7 each, and I ended up walking with all three of them for a cool $12 plus tax.  I love the rustic, sort of primitive look to them.  Problem was, they were pretty tarnished.  Most store bought tarnish removers on the market have a ton of chemicals in them, so I decided to go the au naturel (aka safer and cheaper) route.

diy eco friendly brass tarnish remover

I tried three different methods, and I’m here to share ’em all with you!  It’s like a Goldilocks (Brassilocks?) Cleaning Story.  Come along.
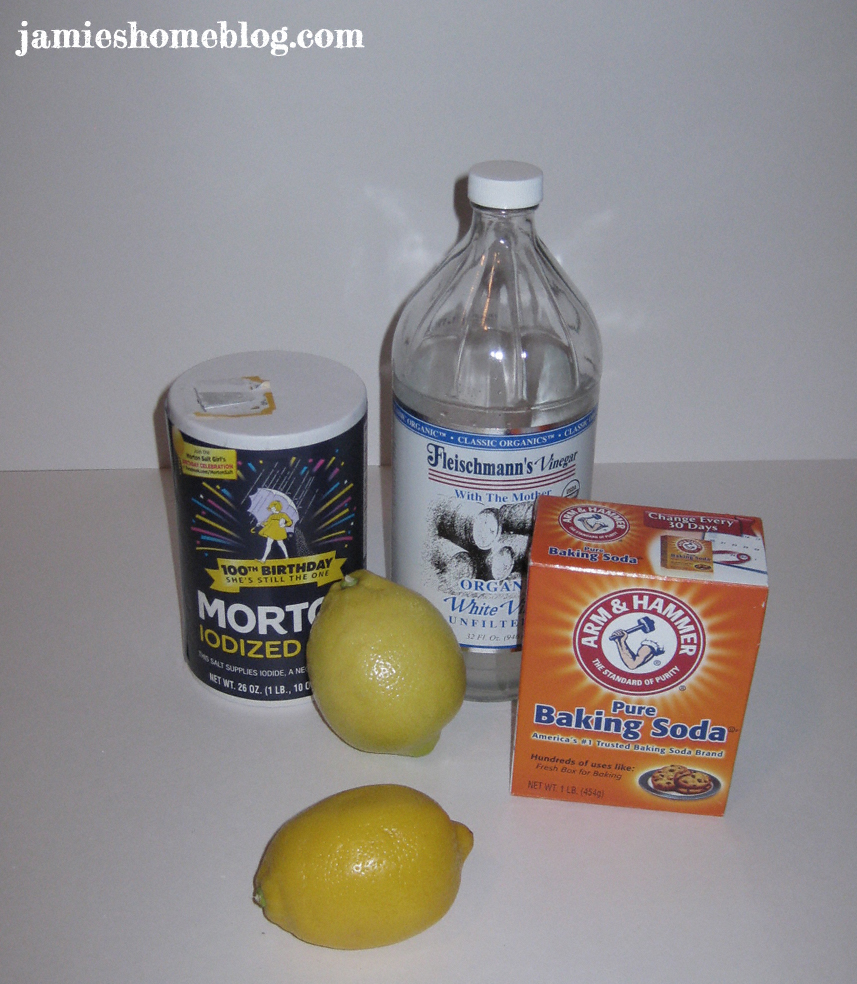
Supply List:

  • White Vinegar
  • Baking Soda
  • Salt
  • Lemons
  • Frog Tape
  • Rubber gloves (both to protect my hands from the mixtures and protect the brass from the natural oil that hands produce)

diy eco friendly brass tarnish remover

Procedures:

They got the frog tape treatment in an effort to protect the wicker from the cleaners I used.  If you’re thinking that it seems difficult to tape these guys with massive man-hands like mine, you’re correct.

diy eco friendly brass tarnish remover

“Too Hot”

First up, the square bowl.  For this, I mixed a couple of tablespoons of white vinegar with a couple of tablespoons of baking soda.  Just like it would in an elementary school chemistry lesson, the mixture fizzed up and made me feel like a mad scientist.  I didn’t measure exactly, just used enough to make a paste.  I put the mixture on a soft tea towel and buffed the rim in little circles all the way around.  Thirty minutes and a bit of elbow grease later, I was pretty pleased with the results.  Check out how much better it looks than the other two.

diy eco friendly brass tarnish remover

“Too Cold”

This time around I used the juice of half of a lemon and baking soda.  This mixture was also fizzy, but smelled much better than the vinegar mixture.  No measuring involved, I just used enough of each ingredient to make a paste.  I used the same method of dipping a soft tea towel into the mixture and buffing in little circles.  This bowl (granted it’s the largest) clocked in at around an hour and this method took a LOT more effort.

diy eco friendly brass tarnish remover

My hands were cramping so badly by the end, I looked like I was repping some sort of gang.  The results, however, looked much better than the vinegar method.

diy eco friendly brass tarnish remover diy eco friendly brass tarnish remover

“Just Right”

The third and final method was super easy, and produced the very best result.  I cut a lemon in fourths, sprinkled some salt on the lemon and rubbed it around the rim of the small round bowl.  I applied little to no pressure, and in under five minutes, the tarnish disappeared completely and the brass had a beautiful shine to it.

diy eco friendly brass tarnish remover

I did a lil’ bad photoshop to put the before and after together so you can see just how dramatically different the after really is.

diy eco friendly brass tarnish remover

Of course I had to use this treatment on the other two bowls as well and damned if they aren’t one of my favorite $12 purchases in the history of ever.

diy eco friendly brass tarnish remover

And what does a lemon cost, like 10 cents?  My wallet loves me.  I got so excited about the finished product that I started writing this post immediately.  Seriously I haven’t even decided where I’m going to put them yet…  One last bit of before + after action:

diy eco friendly brass tarnish remover

So the next time you’re staring at that tarnished brass whatever in your house, grab a lemon and some table salt and treat yourself to this super simple, satisfying polishing technique!

What are your favorite DIY / eco-friendly ways to clean?  Do tell…

DIY Floating Glass Frame and Smart Phone Art

With all of the hundreds of thousands of photo editing iOS and Android apps available these days, creating beautifully crafted photos and prints is in the palms of our hands.  Which is good, because I suck at photoshop.

DIY Floating Glass Frames and Smart Phone Art

Confession: I’m a little bit addicted to the Waterlogue app.  If you haven’t heard about it yet, you might not be on instagram.  It basically makes any photo into a watercolor; and I could watch it work it’s magic ALL. DAY.  As demonstrated by just a few of my grams

waterlogue1

waterlogue2

waterlogue3

waterlogue4

After playing with the app for a few days I knew I wanted to use it for some real life art, so I started combing through all of the phone pics I’ve taken over the last two and a half years (around 3,500 – eep).  I landed on flowers, because watercolors of flowers are the best kind of watercolors.

DIY Floating Glass Frames and Smart Phone Art

DIY Floating Glass Frames and Smart Phone Art

The first is a picture of one of my zinnias from my garden two years ago and the other is a hibiscus planted by the pool in our complex.  The flowers are both so beautiful and both pictures have similar colors so methinks they’re a delightful match.

This is what waterlogue did to them (using the “travelogue” filter) – swoon.

Painted in Waterlogue Painted in Waterlogue

Then I decided to add one of my favorite, albeit cliche, quotes.  I pulled the pics into my Rhonna Designs app to add text.

Lets stop for a second…  If you like to jazz up your pics with text, pattern or doodles, Rhonna’s app is worth every single penny.  There are so many beautiful quotes, textures and designs within the app that I’ve literally spent hours playing around in it before.  Rhonna doesn’t know me from Adam (nor does Waterlogue by the by), I just feel like I need to give her, and the inspiring thousands of RD app users in her social community some props for creating such a positive and encouraging little corner of the interwebs.  You go, Rhonna!

Back to it… I brought the hibiscus pic into my Rhonna Designs app, chose a simple font and a favorite color, did a bit o’ typing and boom… my pic said CARPE.

DIY Floating Glass Frames and Smart Phone Art

Next, the zinnia.  Same color, different text and boom… diem.

DIY Floating Glass Frames and Smart Phone Art

PS I have zero typography knowledge and about the same amount of design skills, but I do know that I like the look of a sans serif paired with script so that’s what I did.  My advice if you’re doing a similar project is to explore whatever tools you have at your fingertips and spend time playing around and studying what you’ve done to see what speaks to you.

I printed them out on some nice heavy card stock because its durable and I like the look of it.  I used my paper slicer to cut off the excess paper.

DIY Floating Glass Frames and Smart Phone Art

So lets talk about what I used to frame them, yes?  These 13.5″ square frames (17.5″ including the frame) with uhh, gambling prints (?) were a freebie from the fella’s mom’s coworker (try to stay with me).  The price tags on the back said they were $59.99.  A piece.  That’s a lotta dough, yo.  I’m lucky to know folks that will give me things like this for free!

DIY Floating Glass Frames and Smart Phone Art

I’m not much of a gambling artwork enthusiast – different strokes, different folks.  I gladly accepted the free frames knowing that I would paint them at some point.  The paper backing came off really easily, but the matting / print was staplegunned in.  I used needle nose pliers to pull them, but it wasn’t easy and I scraped my hand a little.  This is why protecting your hands / face etc is important people!  I had my protective glasses on but not my gloves.  Bad Jamie.

DIY Floating Glass Frames and Smart Phone Art

After I pulled 30 some staples out of each frame I primed them (Zinsser B-I-N spray) and painted them using some of my leftover Delightful Moon by Valspar, which I also used on some art in my living room.

DIY Floating Glass Frames and Smart Phone Art

As for how I turned them into floating print frames… I faux’d it.  I just took regular ol’ scotch tape and taped the edges of the prints down – after I centered them, of course.

DIY Floating Glass Frames and Smart Phone Art

To keep the glass in, I broke out my staple gun.  To keep the recoil from the staple gun from cracking the glass, I folded a tea towel and laid it between the glass and my staple gun like so:

DIY Floating Glass Frames and Smart Phone Art

It worked quite nicely!  Which I’m super happy about, because I thought of it on the fly, and I wasn’t sure it was going to work.

Anyway, just like that they were ready to be hung!  I used my laser level (by far one of my most worthwhile purchases) to make sure they were level and hung them in our office / guest room in a place visible from my desk.

DIY Floating Glass Frames and Smart Phone Art

DIY Floating Glass Frames and Smart Phone Art

I may add another glass panel to the backs one day to make it them true floating glass frames, but I like the idea of being able to just pop these babies off of the wall and add new prints as the seasons (or even my moods) change.

I hope this post has inspired you to create some pretty prints of your own!  Anyone else out there using their smart phone to decorate their house?  Maybe you’re so busy waterloguing that you don’t have time to think about decor?  Do tell…

Three Easy DIY Heart Garlands

Love is in the air and the Hallmark Holiday that many of us celebrate and others love to hate is right around the corner.  I’m not big Valentine’s Day to be honest.  My birthday is the day before (YAY!) so I just ride the birthday high all the way into the 14th and keep on celebratin’.  Plus any excuse to get crafty and make cute decorations is A-OK with me.  Anyway I’m running late with this post so lets get on with it, yes?  Here are three easy diy heart garlands that I made!

diy heart garland tutorial

For the one you see in the top of the above picture, I used cutesy heart paper and music note vellum paper, a piece of card stock for a heart shaped template, decorative baker’s twine and a sewing needle, and some adorable little skeleton key charms.

diy heart garland tutorial

First, I cut the paper into 3″ x 3″ squares.  Making them “hand-held” made it much easier to cut them into heart shapes.

diy heart garland tutorial

I free-handed a teardrop shape in a piece of card stock that was folded in half and cut it out to use as a heart template.

diy heart garland tutorial

Traced it on the back of my paper squares…

diy heart garland tutorial

Then cut the hearts out.  That sounds heartless, but who can resist the bad pun?

IMG_2206

I layered four pieces each time I traced and cut the hearts to make the process faster.  I have no idea how many I cut, I just kept going until I felt like I had enough for my garland (which is around 9 feet long).

diy heart garland tutorial

Then I threaded a sewing needle with my red and white baker’s twine and just strung the hearts together, adding a skeleton key after every fourth heart.  I didn’t follow any formula when sewing the twine into the hearts, just into the front and again into the back somewhere near the top.

diy heart garland tutorial diy heart garland tutorial

diy heart garland tutorial

diy heart garland tutorial

That’s it!  Heart Garland One: Done.

diy heart garland tutorial

The second garland is my Valentine’s Day version of the good ol’ paper chain.  For this I used four 12″ x 12″ pieces of red and pink scrapbook paper, two 12″ x 12″ pieces of decorative scrapbook paper (hearts and the word love), one piece of the 8.5″ x 11″ music note vellum paper, a paper slicer and a stapler.

diy heart garland tutorial

The solid-colored papers, I cut into 8 equal strips; each 1.5″ thick.

diy heart garland tutorial

This paper has a pretty, linen-like texture to it and is thicker than plain paper but not as thick as card stock.  I’m not sure how this project would work with thicker paper but I imagine this next part would be more difficult.

First, I folded the strip in half and stapled it about one-half inch above my fold.

diy heart garland tutorial

diy heart garland tutorial

Then I pulled both sides around and stapled the ends together at the bottom to make a heart!

diy heart garland tutorial IMG_2236

I repeated this process for each of the eight strips from all four papers.

diy heart garland tutorial

diy heart garland tutorial diy heart garland tutorial

I’ll save you the math, that’s 32 times!  This particular garland clocks in at around 15 feet!

Then the heart, love and music note papers were cut into strips that were about 3/4″ thick.

diy heart garland tutorial

I stapled the strips like rings through the hearts to create a heart chain.  And that’s  all, it’s that easy! 

diy heart garland tutorial diy heart garland tutorial

Heart Garland Two: Done.

IMG_2255

This last one took a little longer, but was less step-involved and might be my favorite one.  It’s so simple and cute!  I used eight pieces of V-Day colored felt, a card stock heart template, an iron and stitch witchery, and twine.

diy heart garland tutorial

I used the same teardrop technique from the first garland in this tale to create a heart-shaped template that’s about the size of my palm.

Then I cut hearts out of each piece of felt, two layers at a time.  I didn’t follow a method with this, I just cut a heart, moved the template, cut another and so forth.

diy heart garland tutorial diy heart garland tutorial diy heart garland tutorial

After the hearts were all cut, I pulled out my iron and got to work with the stitch witchery.  If you haven’t used this stuff before, let me break it down real quick for you.

You lay your stitch witchery where you want your fabric to be bonded or hemmed, lay a damp cloth over your fabric, and use your iron to essentially melt the stitch witchery, sealing your fabric just like thread would, but without the stitched look.  It’s even machine washable.  The stuff rocks my socks off.

I used a long strip across the top of one heart and a short strip across the bottom, laid another heart on top, laid my damp cloth on and pressed with my iron for ten seconds.  Then flipped each heart over, laid the damp cloth down again and pressed for another ten seconds on the other side.

diy heart garland tutorial

diy heart garland tutorial

diy heart garland tutorial

I repeated this process I’m not sure how many times, and ended up with a nice little stack of them.  This last garland ended up being around 12 feet long.

diy heart garland tutorial

Then I just strung the twine between the two bonded parts of the hearts.  I used a crochet hook on some of them since the twine seemed to slide through more easily that way.

diy heart garland tutorial diy heart garland tutorial

And just like that… Heart Garland Three: Done.

diy heart garland tutorial

These were so fun to make!  I wish I could have posted this sooner, but there’s still time for you to make one too!  Well, I’m off to hang them now…

diy heart garland tutorial

What diy Valentine’s Day projects have you been up to?  Do you have a favorite of the three garlands I made?  Do tell…

DIY Mid Century Style Nightstand

For the last couple of years, our nightstand situation has been pretty sad.  We’ve been using two mismatched tables of similar sizes that were way too short for our bed and matched zero things in our room.  For about 18 months, I searched craigslist, garage sales, flash sales and flea markets for an affordable matching pair, to no avail.  So I finally took matters into my own hands and made some my dern self!

DIY Mid Century Modern Style Nightstand Tutorial

I mean look at our old ones.  The brown one is a hand me down that needs some TLC and the black one is a $5 goodwill purchase.  They’re so sad I didn’t even give them a thorough cleaning before taking this picture… #keepinitreal

Before Adding New Nightstands

Each of them could be restored / refinished / fixed up somehow and be functional and cute, which I may just do one day.  But they won’t live in my bedroom.  They’ve been pushed to the side for our new mid-century style nightstands!  So here’s how I did it…

Wait – first, you should know that you’ll see lots of safety tips in this post.  I used power tools and chemicals when I made these bad boys, and feel a moral obligation to tell you not to cut your fingers off, sand your hand, or breathe in nasty fumes.  So you’ll have to live with that.

Anytime I take on a big project like this, I like to plan it out on paper.  It usually starts with a shabby sketch of what I want the end result to look like, and that’s followed by a series of measurements, math problems, and budget notes.  See?

DIY Mid Century Modern Style Nightstand Tutorial

I ended up modifying my plans a little bit…  As you’ll see in this post.  Also, I have pretty bad handwriting but since you’re polite I know you’ll look past that…

Here are the materials I used for each table:

  • (2) 20″ x 20″ x 3/4″ pine boards
  • (2) 20″ x 8″ x 3/4″ pine boards
  • (4) 16″ tapered legs (by Waddell Manufacturing)
  • (4) angle top plates for the legs (also Waddell)
  • (8) 1/4″ x 1 1/4″ dowel pins
  • (28) 17 gauge x 1″ nails

Each board got an all over sanding to clean up some of the rough spots.

DIY Mid Century Modern Style Nightstand Tutorial DIY Mid Century Modern Style Nightstand Tutorial

As one should, I started with coarse sandpaper and worked my way up to extra fine, using my Black and Decker hand sander.  Here’s where the safety police drop in for a second…

Always be sure you follow manufacturers instructions and take ALL safety precautions when using power tools.  When I use my hand sander, I wear thick rubber gloves, my eyes (goggles), my ears (earplugs) and a dust mask.

DIY Mid Century Modern Style Nightstand Tutorial

I was originally going to try my hand at Minwax Polyshades with these guys, but when I got to the hardware store, I saw a discounted container of Watco Danish Oil in a pretty Dark Walnut and went for it.  I’d heard good things about it before and was eager to try it out.

DIY Mid Century Modern Style Nightstand Tutorial

Danish Oil is serious stuff, folks.  Again, always follow the manufacturer’s instructions when you use this or any other varnish.  This stuff can spontaneously combust (yes you read that right) if you dispose of your rags incorrectly.  So read the package, and then read it again and then mind what it says, k?  And for pete’s sake protect your eyes and hands when you use this stuff.

DIY Mid Century Modern Style Nightstand Tutorial

I loved working with the Danish Oil.  You only need two coats of it, and it leaves a beautiful finish.  It soaks in more rapidly than stain, and you have to use a bit more elbow grease, but there’s none of that wipe-off nonsense happening.  Not nearly as messy as stain!

DIY Mid Century Modern Style Nightstand Tutorial DIY Mid Century Modern Style Nightstand Tutorial DIY Mid Century Modern Style Nightstand Tutorial

DIY Mid Century Modern Style Nightstand Tutorial DIY Mid Century Modern Style Nightstand Tutorial

Once the Danish Oil fully cured, it was assembly time!  Dowel pins helped to keep the cubby space in place before I nailed it together.  To accomplish this, I busted out my drill.

The safety police are back!  Use protection when you use power tools!  Follow your manufacturer’s instructions!  I wear my eyes AND heavy duty rubber gardening gloves when I use my drill.  Safety is sexy!

Wish me luck as I try to explain this…  Using a 1/4″ bit, I drilled four holes on the top surface (the inside surface?) of the bottom board.  Two on each side, the first was 5″ from the front edge and the second was 5″ from the back edge.

DIY Mid Century Modern Style Nightstand Tutorial

Then I drilled holes in the bottom of the side boards again at 5″ from the front and 5″ from the back.  From there I was able to stick the pins in the holes, which held the side at a right angle to the bottom.

DIY Mid Century Modern Style Nightstand Tutorial

I used a tiny dot of gorilla glue on the ends of the dowel pins for extra security.

DIY Mid Century Modern Style Nightstand Tutorial

I repeated the same process with the top, so it would be held in place securely when it was time to nail everything together.

DIY Mid Century Modern Style Nightstand Tutorial

I used 14 nails on the top and 14 nails on the bottom to secure the top and bottom to the sides.  The nails when in 1″ from the front edge and were spaced 3″ apart, so each side got seven nails.

DIY Mid Century Modern Style Nightstand Tutorial DIY Mid Century Modern Style Nightstand Tutorial

I went for angle top plates as opposed to flat top plates so that the legs would have that slanted, tapered look that’s so iconic to mid century furnishings.  I secured the top plates to the bottom of the cubby space about 2 1/2″ from the sides so the legs wouldn’t stick out well beyond the edges of the table.

DIY Mid Century Modern Style Nightstand Tutorial

Three coats of Polycrylic later, this little guy was ready to take his place in our room!

DIY Mid Century Modern Style Nightstand Tutorial DIY Mid Century Modern Style Nightstand Tutorial

Now let me be real with y’all for a minute… As I was nailing the top board in on one of the nightstands, the board split.  Womp womp.

See how the board I laid on top of it doesn’t lay flush in the middle (white arrow)?  That’s because the 20″ x 20″ board it’s sitting on is split all the way down the length of it on the inside and is hanging by a thread (yellow arrow).  Major sad face.

Broken Table

I had a little cry about it, and then took a few days off from the project to focus on other things and clear my mind.  The truth is, I noticed the crack as I was sanding it, and thought that if I handled it extremely carefully it would be ok, especially once I got some Polycrylic on it.  The crack was so small that I couldn’t even get wood filler into it.  Sadly, it didn’t survive.  You can’t win them all, though.

DIYing wouldn’t be any fun if there weren’t bumps along the road.  I like challenges and the nightstands were one of the bigger ones I’ve taken on recently.  I’ve bought new boards to replace the broken cubby, and am excited to complete the second nightstand soon, hopefully successfully!

But enough about all that, here’s a good ol’ before and after for ya:

DIY Mid Century Modern Style Nightstand Tutorial

I think it turned out great!  Exactly as I had it in my head.  Nice and simple with a mid century modern vibe.  Way better than it’s predecessor!  We just got a new duvet during West Elm’s online bedding sale, so I’ll post an updated picture when that comes in (it’s on backorder right now – boo).

So what about you guys?  Have you built your own nightstand or table?  Or maybe you had a huge setback like I did?  Did you cry, too (humor me)?  Do tell…

Easy, Inexpensive Mini Succulent Garden

Are you wondering how to make a cute little succulent garden for less than ten bones?  If your answer is yes (and it should be), you’re in the right place, friend.  Don’t get too comfortable – this project was so easy, that I did it in less than ten minutes!  So let’s call this the 10 Minute 10 Dollar Succulent Spectacular, shall we?  I’m glad you agree…

Easy DIY Succulent Garden

Three of these succulents were freebies from work.  Because sometimes my employer hands out succulents, I guess.  I didn’t ask too many questions.

Easy DIY Succulent Garden

The fourth is one that I picked out at Home Depot.  Yes, I purchased the one that looks like brains.  It was $2.50 and I’m in love with it.  Don’t judge.  Here’s a fun macro iPic of him.

Easy DIY Succulent Planter

This glass dish was a Goodwill find.  It looks like it may have been an ashtray, or maybe a candy dish, in it’s previous life.  But it’s low center of gravity, diameter and $1.37 + tax price made it the perfect place for my cute little plants to live.

Easy DIY Succulent Garden

I put some glass beads ($1 at the dollar store) in the bottom to allow for drainage.  Succulents and cacti like drainage.  They hold a lot of water in their leaves and stems, so they don’t need their soil to be so moist.  And you don’t need to water them that often, either.  Which means they’re the perfect plant for me.  My thumb isn’t the greenest.

Easy DIY Succulent Garden

After the beads, I threw in a layer of soil for good measure.

Easy DIY Succulent Garden

Easy DIY Succulent Garden

Then I positioned the succulents in a way that I liked, and filled the gaps with cacti soil.  I used this and it cost me $4.54 + tax.

My workspace got a little messy, but that’s ok.  I was playing with dirt for pete’s sake!

Easy DIY Succulent Garden

Then they got a few splashes of water.  And that’s it, folks!  Lets recap, shall we?

  • Brainy Succulent – $2.50 + tax ($2.71)
  • Other Succulents – free
  • Glass Dish – $1.37 + tax ($1.48)
  • Glass Beads – $1.00 + tax ($1.09)
  • Cacti Soil – $4.54 + tax ($4.91)
  • Total – $10.19 !!!

Ok so it wasn’t exactly $10 but pretty dern close, huh?  Not a bad price for this little guy:

Easy DIY Succulent Planter

He lives at my desk at work.  I’m thinking that will be temporary, since I get zero sun in my cubicle.  Boo.  Then again, I could get a cute little task lamp with a UV plant light to fix that.  Who knows.  I just hope I don’t kill the poor thing.  For funsies, here’s a pic of him that I took with my iPhone fisheye lens attachment:

Easy DIY Succulent Planter

Anyone else doing any gardening at their desk?  Or maybe you’re brave enough to fare the crummy weather that most of the country is experiencing and you’re gardening outside?  Do tell…