
I have to admit, I’m a little extra-jazzed about writing this post. This project was one of the most difficult ones I’ve tackled, but the payoff was SO worth it! I’ve wanted some upholstered seating at the end of our bed for a while now, and have been ogling pins like this, this, this, and this. But I was mostly inspired by pins like this, this, and this. I plan on using mid-century touches throughout our entire house. The atomic era – she speaks to me. Since mid-century furniture is way somewhat out of our current budget, it’s time to get creative…
Disclaimer: This post is not intended to instruct you on how to build a bench. I crafted my plans for this bench in my head and just went for it. While I am ALL FOR getting creative and going with an idea that you’re passionate about, I would urge folks to make sure they double check measurements and safety specifications before building anything. Especially when it comes to furniture onto which humans will sit, stand or otherwise weigh down somehow. Seriously. Be smart and be careful.
I ordered four 14″ tall tapered hairpin legs from www.hairpinlegs.com. Ooh pretty…

After they arrived, it was off to the hardware store to pick up the lumber. Originally, I was only going to use one 16″ x 48″ x 3/4″ craft wood plank for the bench seat. The associate at the store was very concerned that the bench wouldn’t be strong enough to support two humans. I’m not certain he fully understood my explanation of the design my bench, but he put enough doubt in my head for me to go ahead and buy two planks. They were only around $10 apiece anyway so I figured better safe than sorry. So now I had the task of securing the boards to each other to create a 1 1/2″ thick base for my bench seat. First, a few swirls of Gorilla Glue and clamps to hold them together nice and tight.
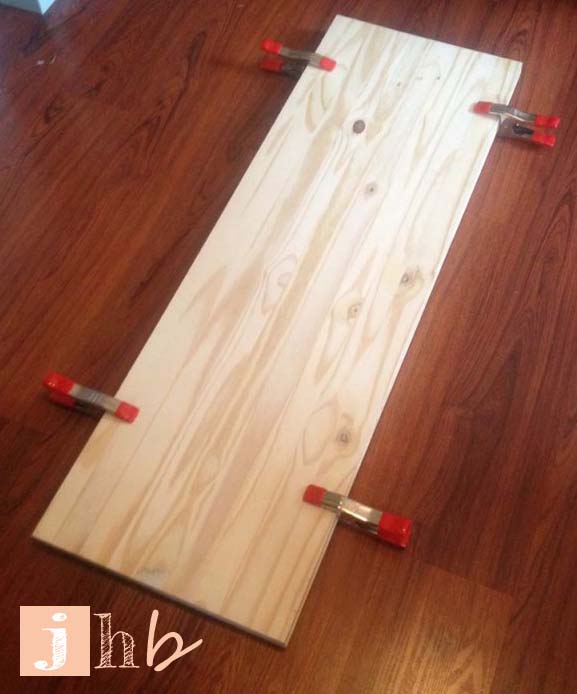
I let the glue set for about 8 hours while I tended to my social life. Then my handsome fella screwed the boards together for me with ten 1 1/4″ wood screws.
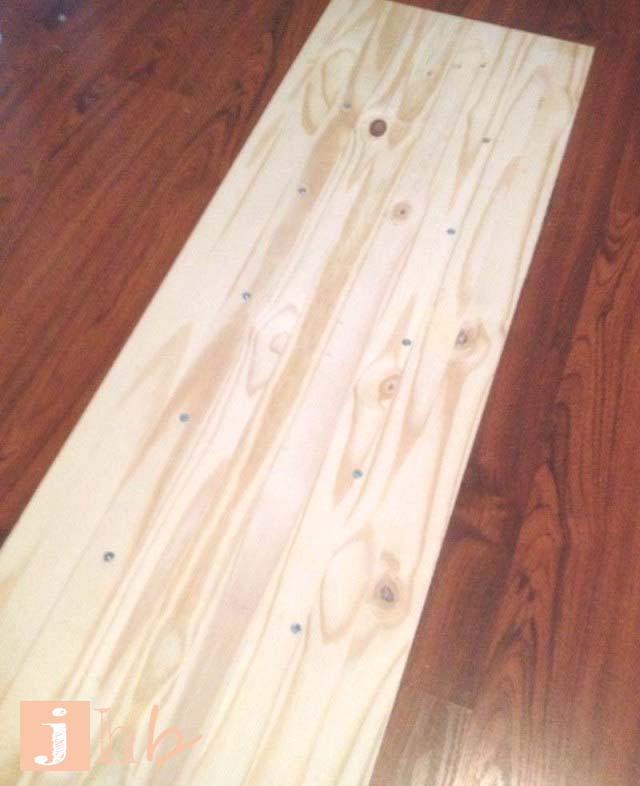
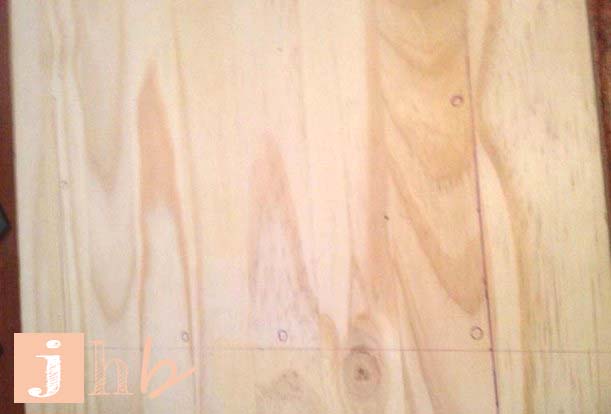
I measured 2″ in from each edge at the corners and used a pen to mark where I would drill the holes to bolt my legs to the wood.

Remember – measure twice, cut drill once! I “measured in” instead of just attaching the legs to the corners, because I wanted the legs to be recessed a bit underneath the bench. I just prefer that look since the legs are tapered.
After I drilled all of my holes, I simply attached the legs with bolts! Easy-peasy lemon squeezy!


If I’m keepin’ it real though, I’ll tell you that I wasn’t really thinking straight when I bought my 2″ bolts. Clearly, you must use bolts that are at least a bit longer than the thickness of what you’re putting them through so that you can secure a nut on the other side. My doubled-up wood planks and the metal base for attaching the legs came out to about 1 3/4″ thick. File that under “ditz moment”. The bolts I used in the end were 2 1/2″ long. They stick out a bit on the underside but no one sees that except Turkish pup. And he’ll just have to deal. On to the upholstery! I bought 3″ thick upholstery foam from JoAnn’s – they will cut it to whatever length you need, but you have to cut the width yourself. I used my mom’s electric carving knife. Fancy! Check out my “concentration face”. Winner!


To secure the foam to the bench (and give the seat softer edges and corners) I wrapped the foam and wood in batting and stapled it to the underside of the bench with my staple gun.

Let’s throw it in reverse for a second. I fell in love with the bold, bright colors and semi-retro style of these two fabrics when the bench was just a plan floating in my brain.

I bought a yard of each and decided that I’d let the fella choose which I would use for the bench. While I’m sure you can guess that he picked the one without any pink in it, it didn’t matter, because I ended up making the bench larger than I originally planned to, and the fabric didn’t fit. Womp womp. No matter though, I have plans for that pretty, pretty fabric! So after some window shopping, discussion and deliberation, we landed on a cognac-colored faux leather. Another round with the staple gun and the bench was done!

I’ll pause while you take a look at this Instagram and do your best wolf whistle.
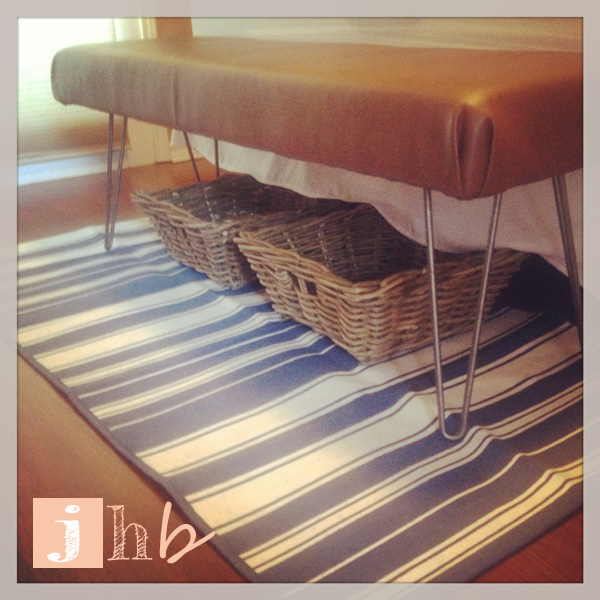
I’m not sure I can explain to you how much I love this bench. For serious, you might get creeped out if I were to try. It lives at the end of our bed on top of a blue striped flat-woven rug from IKEA. And it is as sturdy as a tree trunk – really glad I went for that extra plank, even if I might not have needed it. I added some baskets for storage underneath but they may get switched out for larger bins at some point.

I think if I added the total time spent putting this thing together it would come to less than 2 hours, not counting my Gorilla Glue dry time. Not bad at all! Factor in the fact that I only spent about $100 on materials and I’d say that’s a slice of fried gold! I can’t wait to post about the other projects for our bedroom that I’m working on! Until then… Who else has conceived a project that turned out exactly as they planned? Do tell…

Pingback: MORE Wall Art?! | Canvas and Twine
Pingback: Craigslist Catch | Canvas and Twine
Pingback: DIY Canvas Drop Cloth Textile Headboard | jamie's home blog
Pingback: 77 DIY Bench Ideas – Storage, Pallet, Garden, Cushion
Pingback: DIY Tabletop Leaning Shelf Photo Display | jamie's home blog
Pingback: 40 Easy DIY Bench Ideas You Can Build on a Budget (with Plans)
Pingback: 23 Easy DIY Hairpin Furniture Projects for Mid-century Decor on a Budget