Category Archives: Furniture

The LACK Hack

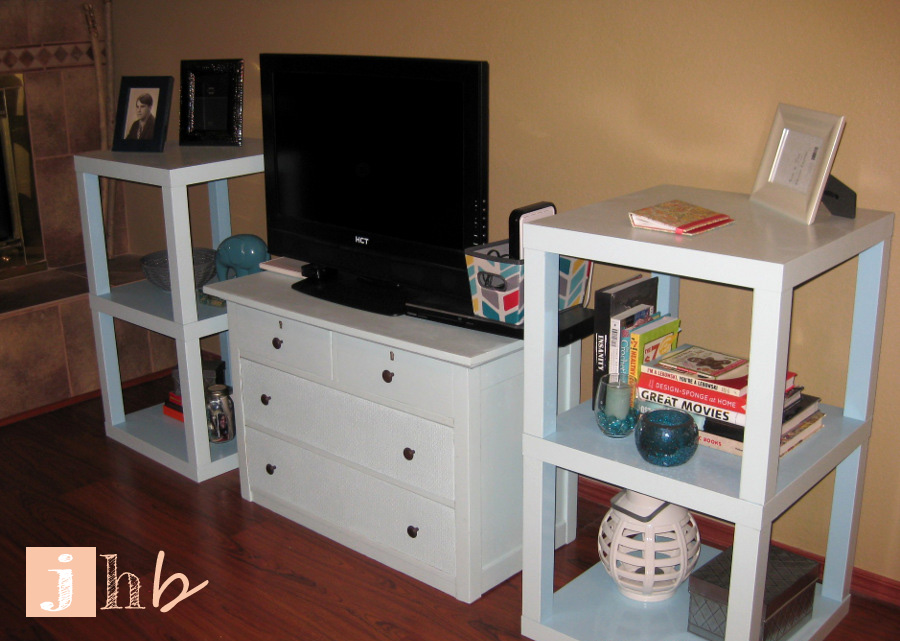
I’ve done a lot of work in our living room. And why not? Much of the time that we clock at home is in there. I’ve already boasted about my media stand, and I promised to return to tell you about the shelves I built to surround her.  I absolutely love them!  Here’s a muddy iPhone pic sneak peek…

LACK Table Hack

My shelves are the brainchildren of a shelf that well-loved home bloggers Sherry and John Petersik made and shared in their book – Young House Love: 243 Ways to Paint, Craft, Update and Show Your Home Some Love.  Sidebar – if you like to DIY, please [safely] run, don’t walk, to your nearest bookstore and treat yourself to this book.  Like right now.  It’s chock-full of tons of creative (and inexpensive!) DIY ideas that you can recreate or re-imagine to make your own.  And with my book in hand and thinking cap on, I did just that.  Ikea hacking has been around for a minute, but I saw how the Petersiks married a few LACK tables with simple assembly techniques to make a shelf and I jumped right on that bandwagon and told the driver to floor it.

Project Checklist

  • Fairly simple – check!
  • Inexpensive – check!
  • Totally customizable – double check!

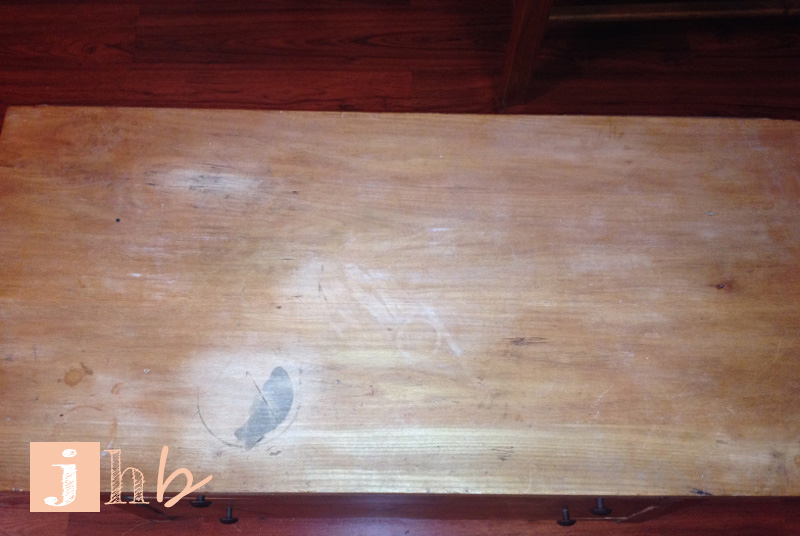
I batted my eyes and used a bit of cheap bribery to get my fella to make the trek to IKEA with me.  We picked up six white LACK tables at a cool $7.99 a pop!  My wallet gave me a kiss afterwards.  Not really.  It should have though.  Here I am opening them up like a kiddo on Christmas [note my previous “shelving” set-up in the background, which was a beat up, wobbly hand-me-down]:

LACK Tables

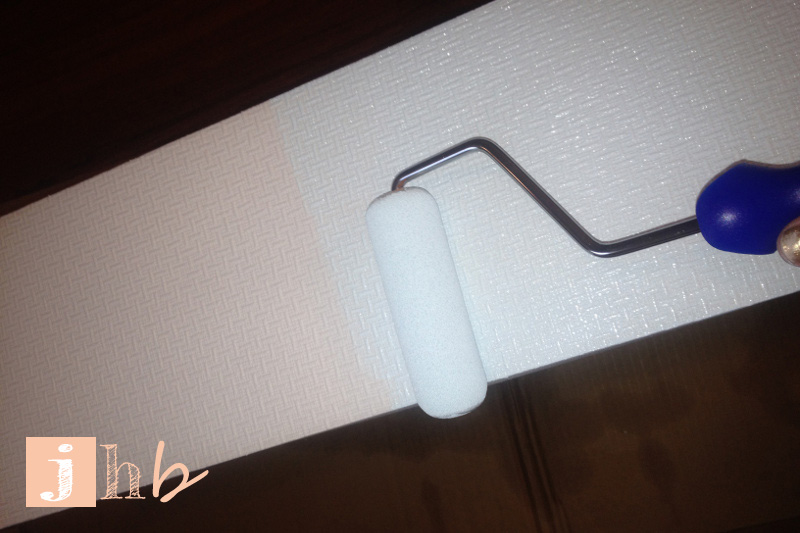
The tables were covered in paper veneer, so I roughed up the surface with a bit of medium sandpaper.  That step was probably unnecessary since I used Zinsser B-I-N primer (which sticks to AN-Y-THING).  But you see, I am paint-paranoid and wanted to be absotively sure that the paint stuck.  Here you see the first set of tables laid out and waiting for a new coat of paint:

IKEA LACK Tables

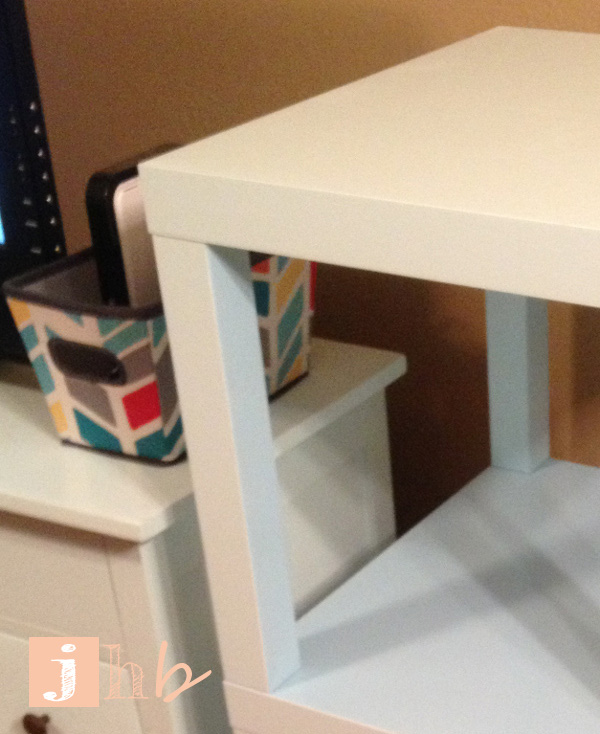
I wanted the shelves to complement the media stand since they’d live next to it, but I wanted them to have a unique feature.  I decided that the exterior surfaces would wear Valspar’s Fountain Mist to match the media stand, and the interior surfaces would wear a shade darker.  Behr’s Rapture Blue looks ravishing next to Fountain Mist, no?

Valspar Fountain Mist and Behr Rapture Blue

Photo sources: Valspar, Behr

You might be thinking “why didn’t she use another Valspar color to get the best match?”, to which I’d reply “chill, man, I had a Home Depot coupon!”.  Ok, maybe I wouldn’t be that blunt.  You get the idea.  So the insides got two coats of Rapture Blue, and the outsides got two coats of Fountain Mist…  I somehow lost the progress pics where the exterior was painted. #blogfail.  But here’s a bit of Rapture Blue for ya:

IKEA LACK Tables Painted Rapture Blue

Once painted, the tables all got a double-dose of polycrylic to protect the paint from chipping.  For direction on how I assembled the tables to make these fine shelves, check out Sherry and John’s book.  You’ll thank me, I promise.  And now the finished product!

IKEA LACK Tables Turned to Shelves

Of course I decked them out with some of my favorite books and a few other decorative items.  I like to switch what lives on them according to season or upcoming holidays too, just to keep it fresh and fun.

IKEA LACK Tables turned Shelves

The media stand was nice, but she looked lonely hanging out on the HUGE wall all by herself.  The shelves were just the thing she needed to bolster her self esteem.  Now it’s a substantial, cohesive unit!

DIY Media Stand

DIY Media Stand

I actually added another component to the media area to help fill the void of blank wall that once existed there.  Stay tuned, I’ll be posting about that project too!

Anyone else getting inspiration from Sherry and John or another fascinating home blog out there?  And who else is charming their partner into taking trips to massive, crowded furniture showrooms?  Do tell…

The Media Stand Blues

My media stand is one of the larger projects that I’ve completed in recent months, so I deemed it the perfect candidate for my inaugural post!  I’ve been using the same small dresser as my media/TV stand for longer than I care to share with the internets (as in the Jr High days – whoa).  This poor thing went through years of mistreatment unintentional neglect.

dresser

Dresser

I mean lets face it, polishing wood furniture was just not on my shortlist of priorities as a teenager.  Shocking, I know.  But before I get into how I gave this dresser a much-needed face lift, I’ll give you a bit of history on her.  My mom bought this dresser for a few bucks off of a neighbor who was moving out of her apartment complex back in the mid-70s.  Fast forward to [insert your guess here] years later, my mom has met my dad, created me and my little sister and given me this dresser.  Several other events happened in between but there’s no time for those shenanigans…

The dresser holds our TV and stores a VCR and several old VHS tapes of school plays and possibly, maybe some recorded episodes of Dawson’s Creek…  And a Super Nintendo and a Game Cube.  Because all of those things are still relevant, right?!  She had a few stains and battle scars and just looked sad in general.  She decided that she wanted a facelift.  She told me so.  Just call me the dresser whisperer.

I first sanded her down with my Black & Decker hand sander, which I did in my back alley on a 107 degree day.  Because that’s my idea of a good time.  Don’t judge.

dresser-sanding-1

Dresser

In case you’re wondering, that’s Disney shelf liner in the drawer you see two pics up.  Mickey, Donald, Goofy, Pluto.  The works.  Who knows how long that’s been there.  Let’s keep it real – I left the liner in there.  I felt a little nostalgic about it.  Even though I have no idea who put it in there or when they did it.  Anyway…

I wanted the piece to have something unique about it.  Enter Allen + Roth textured paint-able wallpaper!  I used their design that’s kind of a cross-hatchy, weaved-looking texture.  I felt that it stood out but was still subtle enough to be versatile and adapt to any environment you use it in.  As you can see from the above photo, there are keyholes in top two drawers.  They stand out on their own and didn’t need to join in on the wallpaper fun.  I primed the drawers that were getting the wallpaper treatment and attached the wallpaper according to Allen + Roth’s instructions.

Allen + Roth Basket Weave

Here comes the fun part!  Once the wallpaper was adhered and completely dry, it was time to give this gal a layer of primer and a fresh coat of paint.  I picked Valspar’s Fountain Mist, which is a lovely pale blue.  Oh and special thanks goes out to my fella, who sacrificed the middle of our living room for several days, which is where I set up shop to paint the thing.  He didn’t utter a single complaint, though I’m sure he wanted to.  Shout out for being awesome, babe!  I wish these pictures did the color justice.  Since they don’t, my white ceramic owl “Darius” is standing in to provide a little perspective.

Wallpapered, Painted Dresser Drawer

Dresser

Since I knew the dresser-media stand hybrid would be getting regular use, I topped the paint off with two coats of Minwax Polycrylic to protect it from chipping.  Minwax says to let the poly dry for 24 hours before use but I waited 72.  I knew I’d be putting a heavy TV on top of her, so I wanted to be extra sure that she was ready to take on the weight without the risk of scratches and chips.  Here she is in her finished state:

Dresser

I absolutely love how this project turned out!  This dresser used to be something I wanted to cover up so people couldn’t see her, but now I love show her off!  I love her so much that I made her two matching shelving units to flank her sides!  I’ll be posting about them very soon…

Anyone else re-doing old pieces of furniture?  Or maybe you also have a significant other that is sweet and accommodating when your hair-brained DIY projects invade your living space?  Do tell…