Category Archives: Repurpose

Art is Everywhere

Friends, I hope you all had a wonderful Easter weekend.  If Easter isn’t your thing, I still hope your weekend rocked.  If you follow me on Instagram, you may have seen that the fam and I enjoyed a decadent brunch this Sunday, including Quiche Lorraine, Honey Baked Ham, Fruit, Mimosas, loaded potatoes and my favorite thing to make, bacon wrapped cinnamon rolls!

Brunch

Because my mom is the coolest lady you’ve ever heard of, she still gives my sister and I (and even our boyfriends) Easter baskets full of treats.  It’s not like we’re in our late twenties or anything… Lies, we are.  One of my treats this year was a little 5″ x 7″ Peter Rabbit puzzle called Scarecrow.  The fella and I put it together last night while pigging out on chocolate bunnies and skittles.  I was smitten y’all.

how to preserve a puzzle to use it as art

I laid three coats of Antique Matte Mod Podge on that baby and let it dry overnight.

how to preserve a puzzle to use it as art

This particular type of Mod Podge has an ever-so-slight tan-ish tint to it, giving an antique look to whichever surface it’s applied.  The image already has that kind of look to it so I didn’t actually need to use the antique matte but it was the only Mod Podge I had on hand.

how to preserve a puzzle to use it as art

I popped my ‘podged puzzle into this pretty pearl picture frame.  (What is my deal with alliteration lately?)

how to preserve a puzzle to use it as art

The frame was one of my many clearance Target purchases – $4.94 check and yes please.

As the title of this post points out, art is everywhere.  Even in a “gag gift” (her words) your mom the Easter Bunny stuffed into your Easter basket.  I love the simple, quaint feel of the picture.  Props to Beatrix Potter for creating such sweet imagery.  I don’t have kiddos but I think it would be perfect in a nursery!

how to preserve a puzzle to use it as art

Have you ever preserved a puzzle to use as artwork?  Do tell…

Advertisement

Easy, Inexpensive Mini Succulent Garden

Are you wondering how to make a cute little succulent garden for less than ten bones?  If your answer is yes (and it should be), you’re in the right place, friend.  Don’t get too comfortable – this project was so easy, that I did it in less than ten minutes!  So let’s call this the 10 Minute 10 Dollar Succulent Spectacular, shall we?  I’m glad you agree…

Easy DIY Succulent Garden

Three of these succulents were freebies from work.  Because sometimes my employer hands out succulents, I guess.  I didn’t ask too many questions.

Easy DIY Succulent Garden

The fourth is one that I picked out at Home Depot.  Yes, I purchased the one that looks like brains.  It was $2.50 and I’m in love with it.  Don’t judge.  Here’s a fun macro iPic of him.

Easy DIY Succulent Planter

This glass dish was a Goodwill find.  It looks like it may have been an ashtray, or maybe a candy dish, in it’s previous life.  But it’s low center of gravity, diameter and $1.37 + tax price made it the perfect place for my cute little plants to live.

Easy DIY Succulent Garden

I put some glass beads ($1 at the dollar store) in the bottom to allow for drainage.  Succulents and cacti like drainage.  They hold a lot of water in their leaves and stems, so they don’t need their soil to be so moist.  And you don’t need to water them that often, either.  Which means they’re the perfect plant for me.  My thumb isn’t the greenest.

Easy DIY Succulent Garden

After the beads, I threw in a layer of soil for good measure.

Easy DIY Succulent Garden

Easy DIY Succulent Garden

Then I positioned the succulents in a way that I liked, and filled the gaps with cacti soil.  I used this and it cost me $4.54 + tax.

My workspace got a little messy, but that’s ok.  I was playing with dirt for pete’s sake!

Easy DIY Succulent Garden

Then they got a few splashes of water.  And that’s it, folks!  Lets recap, shall we?

  • Brainy Succulent – $2.50 + tax ($2.71)
  • Other Succulents – free
  • Glass Dish – $1.37 + tax ($1.48)
  • Glass Beads – $1.00 + tax ($1.09)
  • Cacti Soil – $4.54 + tax ($4.91)
  • Total – $10.19 !!!

Ok so it wasn’t exactly $10 but pretty dern close, huh?  Not a bad price for this little guy:

Easy DIY Succulent Planter

He lives at my desk at work.  I’m thinking that will be temporary, since I get zero sun in my cubicle.  Boo.  Then again, I could get a cute little task lamp with a UV plant light to fix that.  Who knows.  I just hope I don’t kill the poor thing.  For funsies, here’s a pic of him that I took with my iPhone fisheye lens attachment:

Easy DIY Succulent Planter

Anyone else doing any gardening at their desk?  Or maybe you’re brave enough to fare the crummy weather that most of the country is experiencing and you’re gardening outside?  Do tell…

Icemageddon 2013 and Christmas Spirit

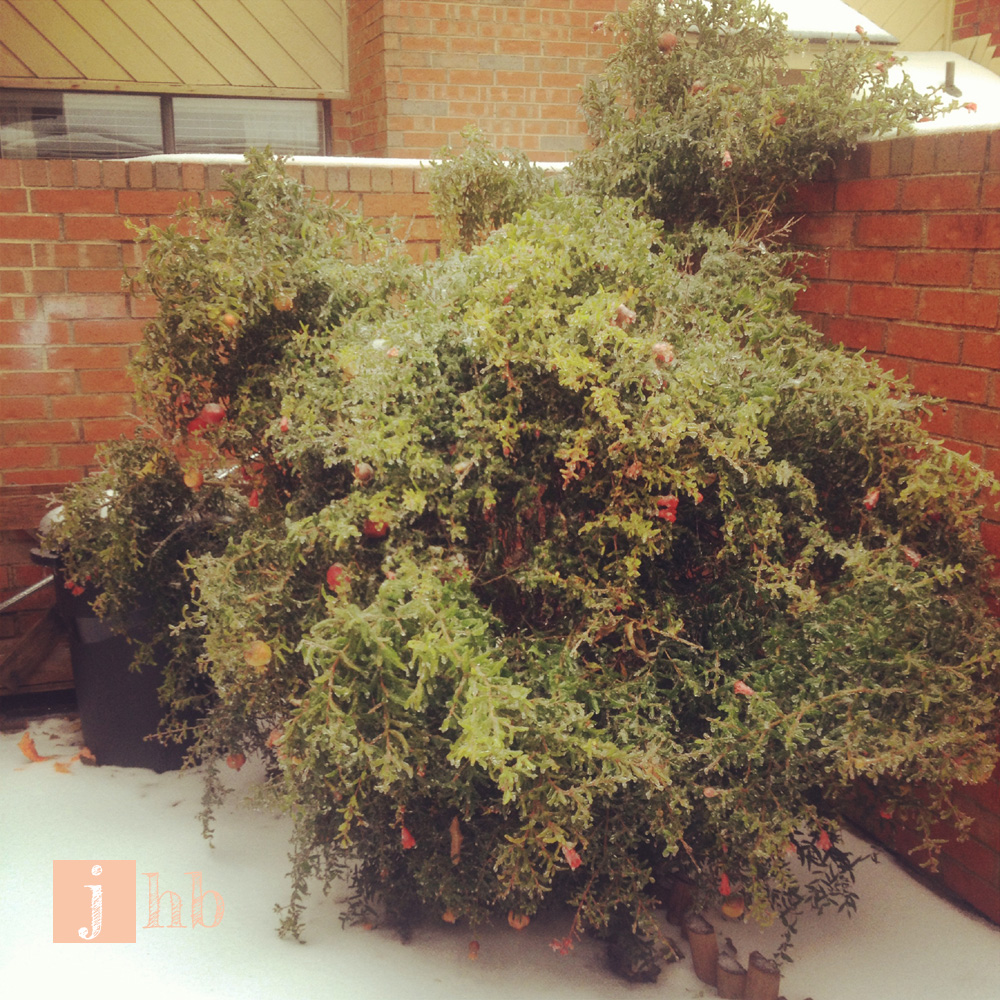
Icemageddon.  That is what the news and social media have taken to calling what the Dallas / Fort Worth area experienced on the 5th of December.  Here in North Texas the temps rarely get cold enough for us to get any kind of decent snow, but every now and again a weather anomaly occurs.  In the case of Icemageddon 2013, we were at 79 degrees on Wednesday the 4th, and by Friday, it looked like this:

Icemageddon 2013

Unfortunately, that is ice, not snow.  Look what it did to our poor pomegranate bush!  Trust me y’all… it’s never looks saggy like this.

Pomegranate Bush Covered In Ice

Folks cleared the shelves at the grocery store in anticipation of the bad weather, which was pretty smart because the roads were incredibly dangerous all weekend.  I was ok with that though, because being “iced in” gave me plenty of time to do Christmas-y stuff!

One of my favorite Christmas activities is baking and decorating sugar cookies!

Five Pounds of Sugar Cookie Dough

Homemade Sugar Cookies

I really need to work on my icing skills, but the cookies taste great, and that’s what matters most, right?

Christmas Sugar Cookies with Royal Icing

Of course the fella requested that I make him a couple of Christmas Ninjas.  The fella has very simple wants.

Ninja Sugar Cookies with Royal Icing

I use this recipe from Bee in our Bonnet.  The recipe makes about 140 cookies when I use my Wilton Christmas cutters, so I have plenty for our families and friends!  And seriously, the royal icing is the best thing EVER.  Any recipe that calls for 2 lbs of powdered sugar is A-OK with me (that would be the royal icing folks).  Tip: I opted to roll my dough out between two pieces of saran wrap, and dipped my cookie cutters in powdered sugar instead of flour.  The flour can dry out the dough and I’ve found that powdered sugar doesn’t have the same drying effect.  If you ever feel like looking at something pretty, check out Bee in our Bonnet‘s website.  Their cookies are so beautiful; they’re little works of art!

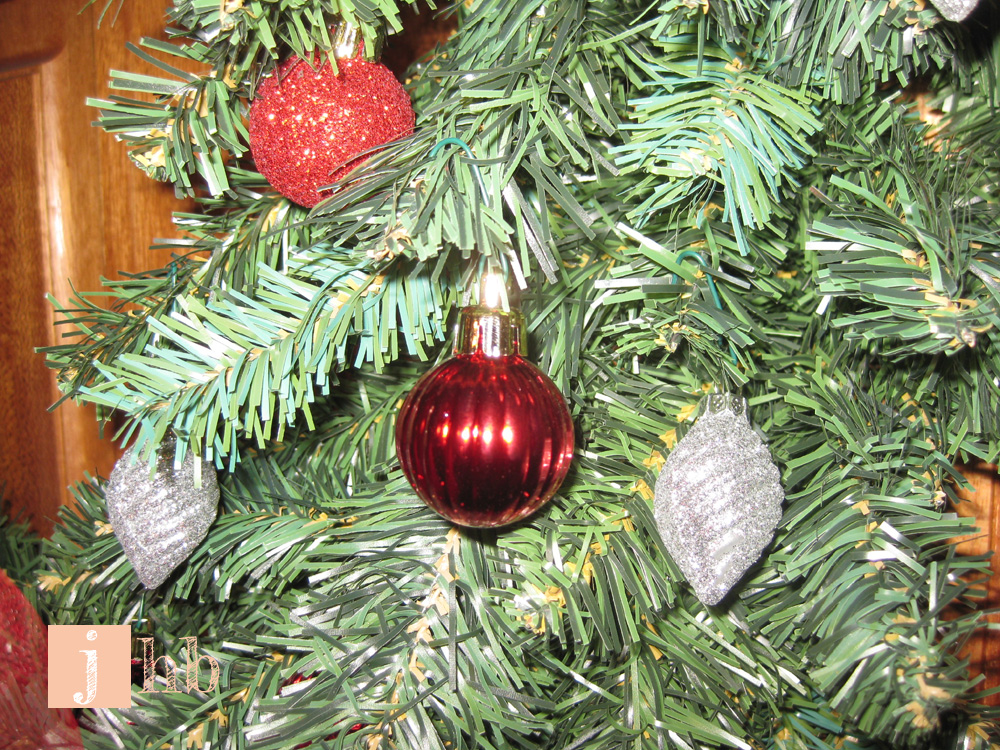
I also worked on some Christmas decorating to combat feelings of cabin fever.  We already put up and decorated our tree right after Thanksgiving, details here.

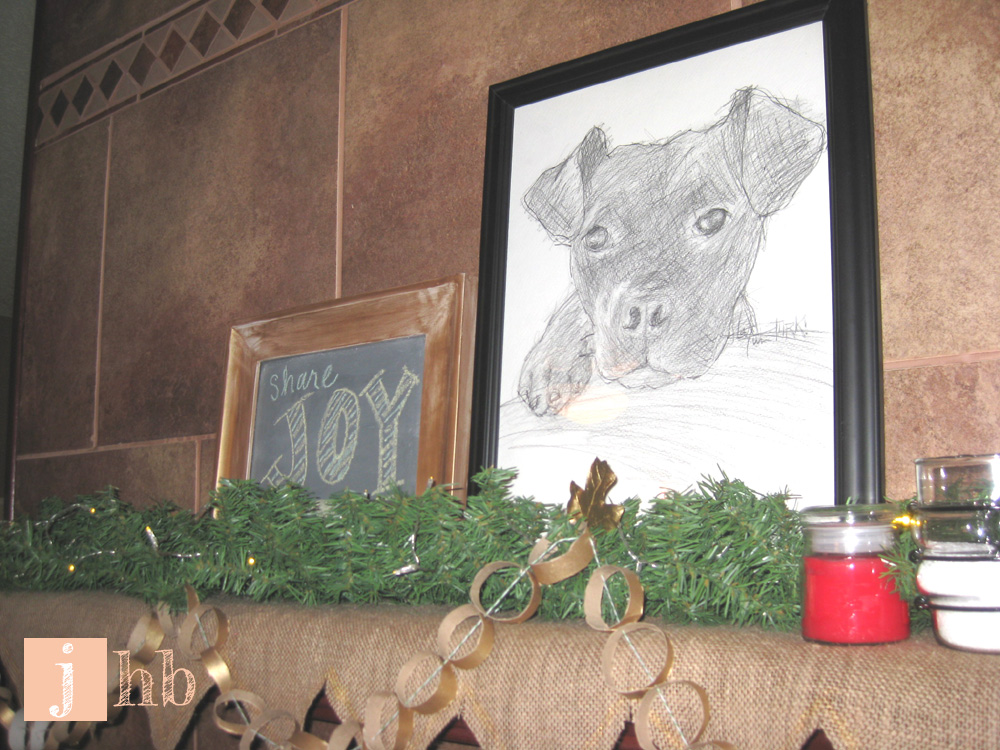
But Icemageddon weekend, I worked on the mantel.  First, I made this little garland with toilet paper and paper towel rolls.  ‘Cause I’m classy like that, feel me?

I painted the rolls gold with my Martha Metallic Glaze in Medallion.

DIY Christmas Garland

Then I cut the rolls into little rings and used some decorative baker’s twine to string the rings together.  I love how simple and cute it is!

DIY Christmas Garland

I used the same glaze on this frame that I scored for $4 at a thrift store ages ago.  I put four coats on top of the white paint that was on the frame and it gives it a brushed brass look.  I love it!

Frame Painted with Gold Glaze

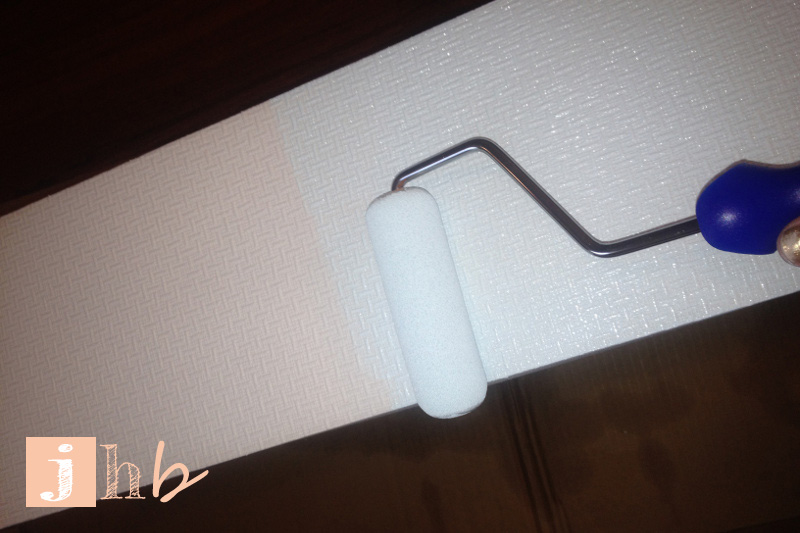
I primed the glass (Zinsser B-I-N of course) and then painted it with Rustoleum Chalkboard Paint in Moonstone.  I used this same chalkboard paint on another project that I’ll be sharing here soon, so stay tuned for that!  Meanwhile, here’s a progress pic of the chalkboard paint on the glass.

Mini Chalkboard DIY

You have to wait three days to condition the chalkboard paint (basically, conditioning is giving it a light all-over coat of chalk by rubbing the side of a piece of chalk across the entire board and then wiping it off so you have a soft, chalky surface to write on). So once I was able to do that, I wrote this festive little message!

DIY Mini Chalkboard

I have it sitting next to the portrait of Turkish that my dad drew and gave to me last Christmas. That picture has lived on the mantel all year and as of now I have no plans to change that. Not to brag but isn’t my Dad so talented?!

Christmas Mantel

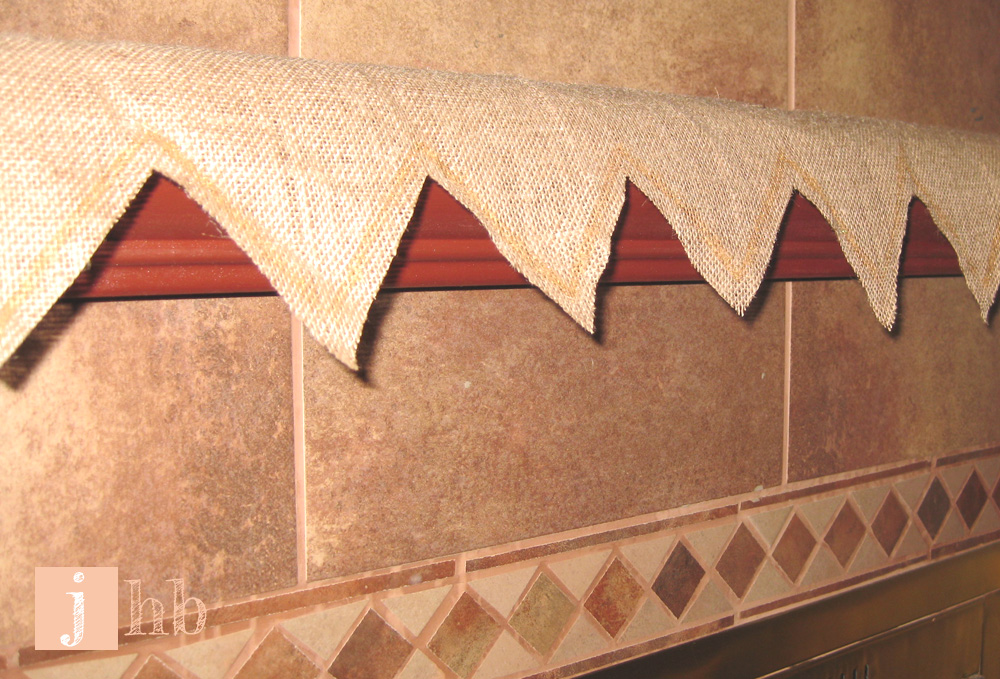
I also made what I’m calling a mantel cloth.  It’s like a table cloth for your mantel.  There is probably a really fancy name for it, but that word is not in my vernacular.  And I’m busy writing this post, so I’m not gonna google it, k?

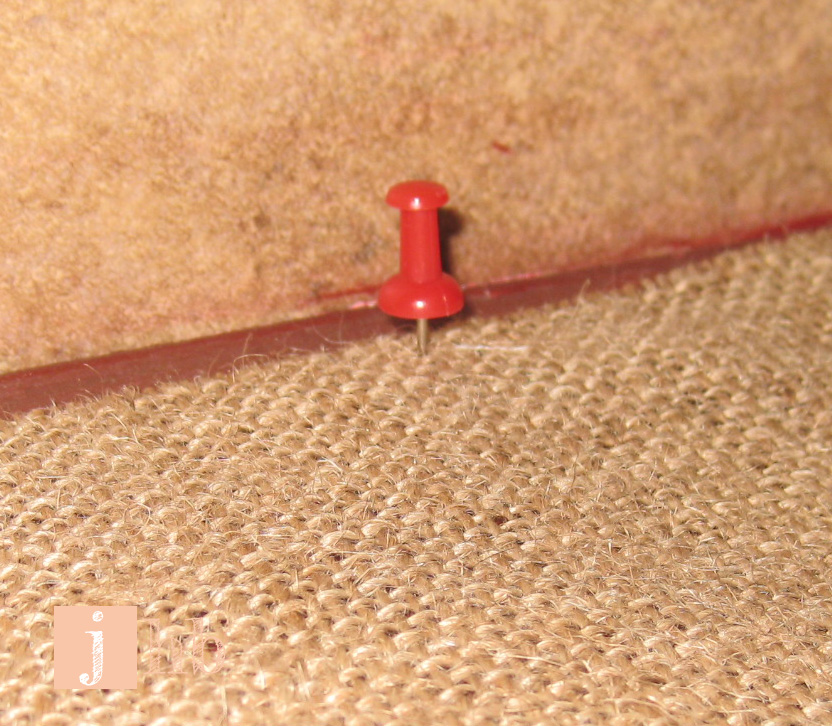
I’ll be honest, our mantel (and really our whole fireplace in general) is not my taste.  At all…  I dream of a day when I can have a natural stone or white brick fireplace…  But since we rent, demo-ing ours and building a new one just isn’t in the cards.  Enter the mantel cloth.  Mantel out of sight, mantel out of mind, that’s what I always say.  I said that once, just now, but anyway…  I just cut up some burlap that I’ve had sitting around forever a while and lightly tacked it to the mantel.  

Burlap Cloth on Fireplace Mantel

IMG_1908

I also painted a little gold line along the points, as you can see two photos up.  It looked much prettier in my head.  But you can hardly see it now so it was really an unnecessary step.

All of these little projects combined with my faux greenery and some battery operated lights made for a pretty cute little mantel, I think!

Christmas Fireplace Mantel

I also whipped up a quick wreath for our door.  I just hung some tiny ornaments on it, tied a bow of red tulle to the bottom and called it a day.  We have a storm door, and our door doesn’t face the street, so I opted to hang it inside instead of outside.  We get more face time with it that way anyway.  If its been made, someone should see it, right?!

Christmas Wreath

Christmas Wreath

I know that countless folks out there were affected by that nasty ol’ Icemageddon… How did you guys spend it? Or were you lucky enough to avoid it? Do tell…

The LACK Hack

I’ve done a lot of work in our living room. And why not? Much of the time that we clock at home is in there. I’ve already boasted about my media stand, and I promised to return to tell you about the shelves I built to surround her.  I absolutely love them!  Here’s a muddy iPhone pic sneak peek…

LACK Table Hack

My shelves are the brainchildren of a shelf that well-loved home bloggers Sherry and John Petersik made and shared in their book – Young House Love: 243 Ways to Paint, Craft, Update and Show Your Home Some Love.  Sidebar – if you like to DIY, please [safely] run, don’t walk, to your nearest bookstore and treat yourself to this book.  Like right now.  It’s chock-full of tons of creative (and inexpensive!) DIY ideas that you can recreate or re-imagine to make your own.  And with my book in hand and thinking cap on, I did just that.  Ikea hacking has been around for a minute, but I saw how the Petersiks married a few LACK tables with simple assembly techniques to make a shelf and I jumped right on that bandwagon and told the driver to floor it.

Project Checklist

  • Fairly simple – check!
  • Inexpensive – check!
  • Totally customizable – double check!

I batted my eyes and used a bit of cheap bribery to get my fella to make the trek to IKEA with me.  We picked up six white LACK tables at a cool $7.99 a pop!  My wallet gave me a kiss afterwards.  Not really.  It should have though.  Here I am opening them up like a kiddo on Christmas [note my previous “shelving” set-up in the background, which was a beat up, wobbly hand-me-down]:

LACK Tables

The tables were covered in paper veneer, so I roughed up the surface with a bit of medium sandpaper.  That step was probably unnecessary since I used Zinsser B-I-N primer (which sticks to AN-Y-THING).  But you see, I am paint-paranoid and wanted to be absotively sure that the paint stuck.  Here you see the first set of tables laid out and waiting for a new coat of paint:

IKEA LACK Tables

I wanted the shelves to complement the media stand since they’d live next to it, but I wanted them to have a unique feature.  I decided that the exterior surfaces would wear Valspar’s Fountain Mist to match the media stand, and the interior surfaces would wear a shade darker.  Behr’s Rapture Blue looks ravishing next to Fountain Mist, no?

Valspar Fountain Mist and Behr Rapture Blue

Photo sources: Valspar, Behr

You might be thinking “why didn’t she use another Valspar color to get the best match?”, to which I’d reply “chill, man, I had a Home Depot coupon!”.  Ok, maybe I wouldn’t be that blunt.  You get the idea.  So the insides got two coats of Rapture Blue, and the outsides got two coats of Fountain Mist…  I somehow lost the progress pics where the exterior was painted. #blogfail.  But here’s a bit of Rapture Blue for ya:

IKEA LACK Tables Painted Rapture Blue

Once painted, the tables all got a double-dose of polycrylic to protect the paint from chipping.  For direction on how I assembled the tables to make these fine shelves, check out Sherry and John’s book.  You’ll thank me, I promise.  And now the finished product!

IKEA LACK Tables Turned to Shelves

Of course I decked them out with some of my favorite books and a few other decorative items.  I like to switch what lives on them according to season or upcoming holidays too, just to keep it fresh and fun.

IKEA LACK Tables turned Shelves

The media stand was nice, but she looked lonely hanging out on the HUGE wall all by herself.  The shelves were just the thing she needed to bolster her self esteem.  Now it’s a substantial, cohesive unit!

DIY Media Stand

DIY Media Stand

I actually added another component to the media area to help fill the void of blank wall that once existed there.  Stay tuned, I’ll be posting about that project too!

Anyone else getting inspiration from Sherry and John or another fascinating home blog out there?  And who else is charming their partner into taking trips to massive, crowded furniture showrooms?  Do tell…

The Media Stand Blues

My media stand is one of the larger projects that I’ve completed in recent months, so I deemed it the perfect candidate for my inaugural post!  I’ve been using the same small dresser as my media/TV stand for longer than I care to share with the internets (as in the Jr High days – whoa).  This poor thing went through years of mistreatment unintentional neglect.

dresser

Dresser

I mean lets face it, polishing wood furniture was just not on my shortlist of priorities as a teenager.  Shocking, I know.  But before I get into how I gave this dresser a much-needed face lift, I’ll give you a bit of history on her.  My mom bought this dresser for a few bucks off of a neighbor who was moving out of her apartment complex back in the mid-70s.  Fast forward to [insert your guess here] years later, my mom has met my dad, created me and my little sister and given me this dresser.  Several other events happened in between but there’s no time for those shenanigans…

The dresser holds our TV and stores a VCR and several old VHS tapes of school plays and possibly, maybe some recorded episodes of Dawson’s Creek…  And a Super Nintendo and a Game Cube.  Because all of those things are still relevant, right?!  She had a few stains and battle scars and just looked sad in general.  She decided that she wanted a facelift.  She told me so.  Just call me the dresser whisperer.

I first sanded her down with my Black & Decker hand sander, which I did in my back alley on a 107 degree day.  Because that’s my idea of a good time.  Don’t judge.

dresser-sanding-1

Dresser

In case you’re wondering, that’s Disney shelf liner in the drawer you see two pics up.  Mickey, Donald, Goofy, Pluto.  The works.  Who knows how long that’s been there.  Let’s keep it real – I left the liner in there.  I felt a little nostalgic about it.  Even though I have no idea who put it in there or when they did it.  Anyway…

I wanted the piece to have something unique about it.  Enter Allen + Roth textured paint-able wallpaper!  I used their design that’s kind of a cross-hatchy, weaved-looking texture.  I felt that it stood out but was still subtle enough to be versatile and adapt to any environment you use it in.  As you can see from the above photo, there are keyholes in top two drawers.  They stand out on their own and didn’t need to join in on the wallpaper fun.  I primed the drawers that were getting the wallpaper treatment and attached the wallpaper according to Allen + Roth’s instructions.

Allen + Roth Basket Weave

Here comes the fun part!  Once the wallpaper was adhered and completely dry, it was time to give this gal a layer of primer and a fresh coat of paint.  I picked Valspar’s Fountain Mist, which is a lovely pale blue.  Oh and special thanks goes out to my fella, who sacrificed the middle of our living room for several days, which is where I set up shop to paint the thing.  He didn’t utter a single complaint, though I’m sure he wanted to.  Shout out for being awesome, babe!  I wish these pictures did the color justice.  Since they don’t, my white ceramic owl “Darius” is standing in to provide a little perspective.

Wallpapered, Painted Dresser Drawer

Dresser

Since I knew the dresser-media stand hybrid would be getting regular use, I topped the paint off with two coats of Minwax Polycrylic to protect it from chipping.  Minwax says to let the poly dry for 24 hours before use but I waited 72.  I knew I’d be putting a heavy TV on top of her, so I wanted to be extra sure that she was ready to take on the weight without the risk of scratches and chips.  Here she is in her finished state:

Dresser

I absolutely love how this project turned out!  This dresser used to be something I wanted to cover up so people couldn’t see her, but now I love show her off!  I love her so much that I made her two matching shelving units to flank her sides!  I’ll be posting about them very soon…

Anyone else re-doing old pieces of furniture?  Or maybe you also have a significant other that is sweet and accommodating when your hair-brained DIY projects invade your living space?  Do tell…