Category Archives: Decor

Herringbone Happiness

I wish I could decorate my house and play around on this blog full time, but like everyone else, I have bills to pay.  Luckily, I absolutely love my nine-to-fiver!  I don’t love, however, that I spend it in a cubicle that is beige, grey and greige.  But with a little effort and very little cash, I injected some happy into the space in which I spend most of my week!

I already had this sweet little console table in there, but it needed some love.

Console Table

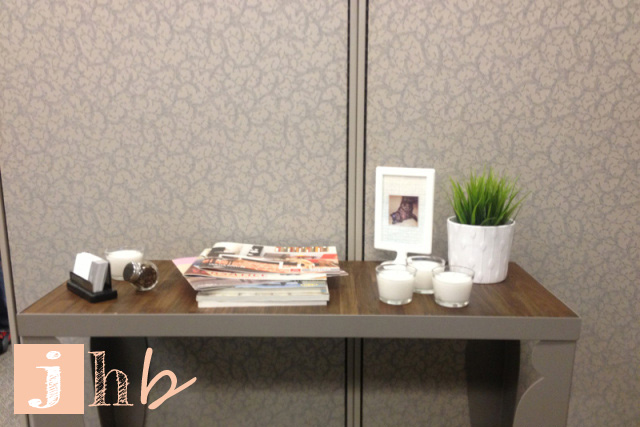
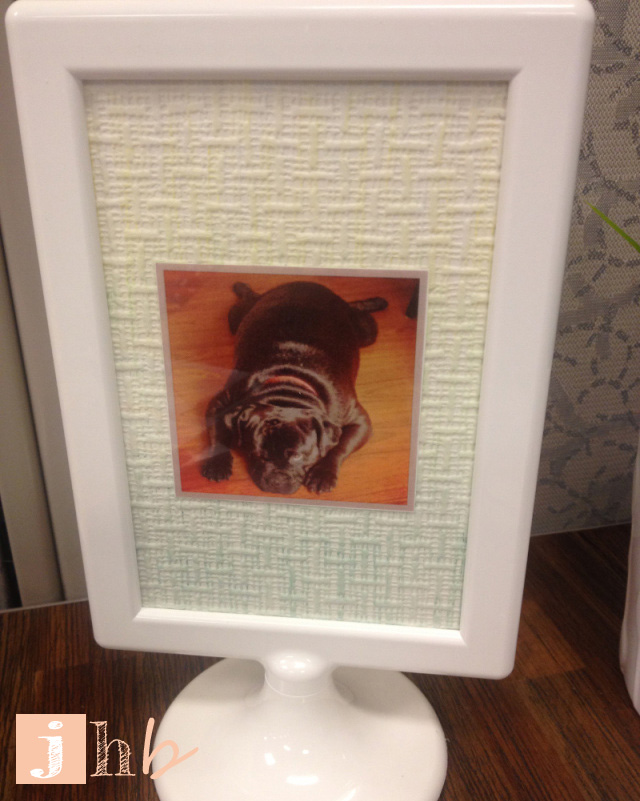
On a post-work trip to IKEA one night, I picked up a few simple decorative items to style the table.  I bought the TOLSBY 2-sided frame ($0.99), four little MÅTTFULL candles ($0.79 ea), a FEJKA plant ($3.99), and a plant pot ($1.49 – can’t find the link).  That’s a grand total of $9.63 pre-tax, y’all.  Cute, right?

Things

For the TOLSBY, I used some of the leftover Allen + Roth basketweave paintable wallpaper from my media stand project as the matting.  I used colored pencils to do an ombre effect on the wallpaper and then just taped a couple of my favorite Instagrams of my pup to the ombre’d matting.

Frame

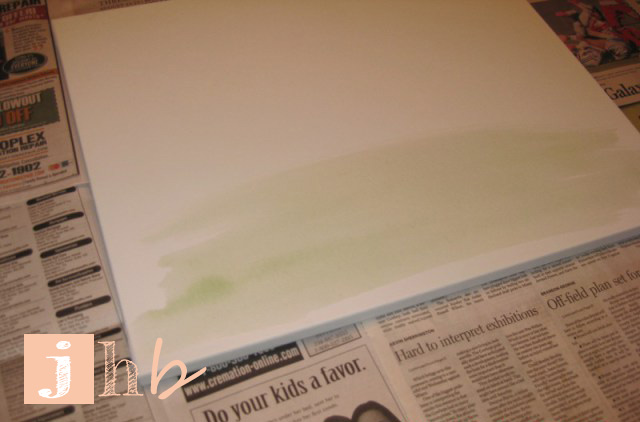
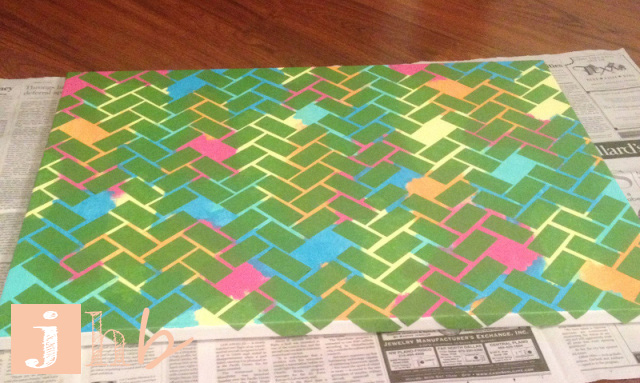
Now here’s where the herringbone comes in…  This pin is constantly showing up in my pinterest feed.  And it makes me swoon.  I had to make one.  I used the concept and put my own little spin on it.  With all of the beige, grey and greige in my cubicle, I needed brightness in there.  I taped off the edges of my canvas (bought at Hobby Lobby for about $8.50 with their weekly coupon) since I wanted them to stay white.  I picked some loud, funky colors and started laying them down randomly.

Herringbone Wall Art

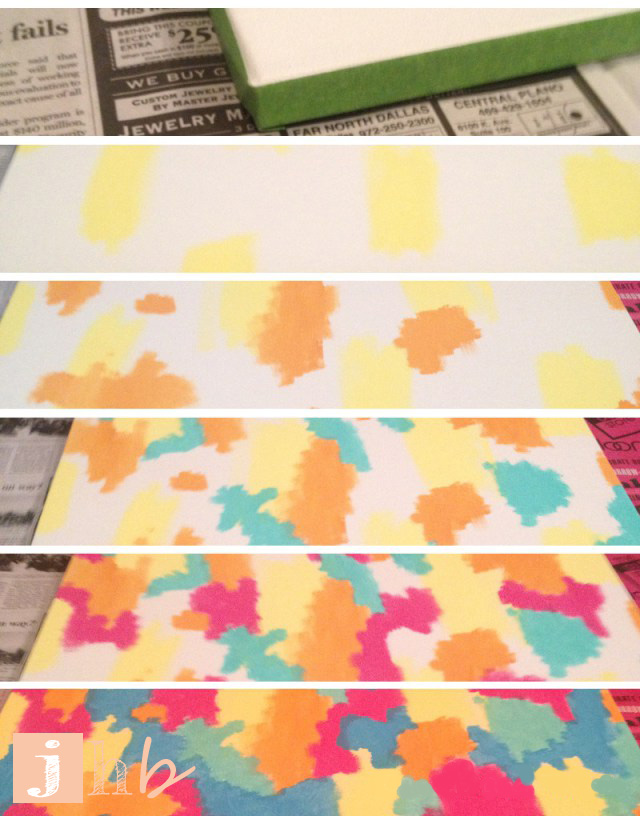
Then, I let the whole thing dry overnight.

Wall Art

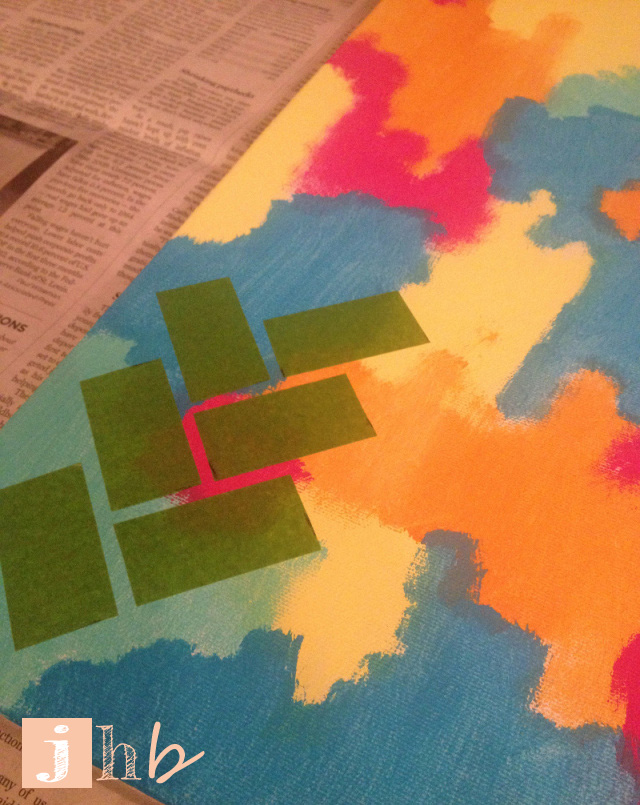
I probably didn’t have to do that before this next step but I wanted to be extra careful.  Also I wanted to watch the season finale of So You Think You Can Dance…  Don’t judge me.  So the next night I started the herringbone pattern.  To create the design, I cut up strips of frog tape.  Lots of strips of frog tape.  For like two hours.  It was the most tedious part of the project, but it was totally and completely worth it.

Frog Tape Herringbone Pattern

Frog Tape in Herringbone Pattern

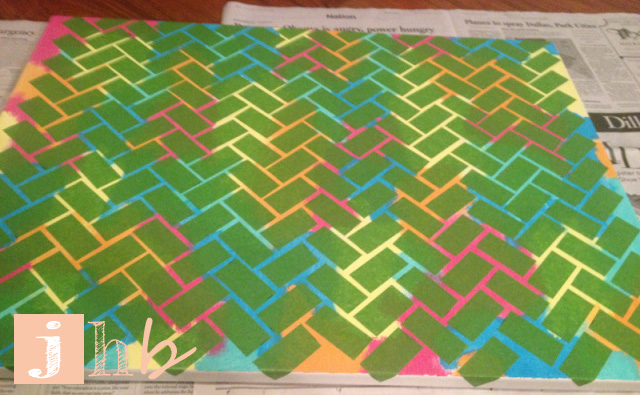
I picked a few spots that I wanted to remain white and removed the tape.

Frog Tape Herringbone Pattern

Then I painted the whole thing with white acrylic paint.

Paint Over Frog Tape Herringbone Pattern

I didn’t wait to take the tape of before it dried.  I just used tweezers to carefully and quickly pull off each piece.

Frog Tape Wall Art Herringbone Pattern

I also painted the edges white to make it look more finished.  You can sort-of tell in the above photo, right?  Look at my pretty, pretty herringbone art.

Herringbone Art from Frog Tape

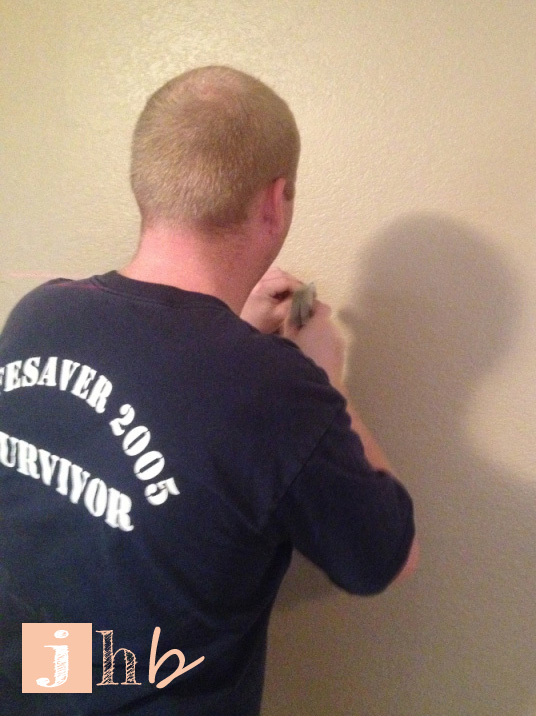
The wood frame of the canvas rests perfectly on two cubicle clips.  You wouldn’t believe how happy I get every time I walk into my cubicle now!

Herringbone Art in Cubicle

Anyone else doing anything to their workspace to jazz it up a bit?  Do tell…

Worldly Wall Art – Part II

In my last post I talked about some frames that hung around for a long time that finally got some love and attention.  Those postcards that I framed have some company!  Lindsey at Better After recently wrote about some goodies that she got from Map My State (did this sentence have enough links in it for you?).  I fell in love!  I ended up purchasing two prints.

Map My State Prints

Texas and Michigan are close to my heart.  I was born in Kalamazoo, MI.  My whole family is from various cities in The Great Lakes State.  From Holland to Dearborn and beyond, we have Michigan covered!  We moved away when I was young, and I totally wish I could go up and visit more often.  I have lived in Texas suburbs in the DFW Metro Area since I was six years old.  And that mega handsome boyfriend of mine was born in Dallas and grew up in the DFW suburbs too.  Many of our memories were made here, and we both consider the area our forever home.  Suffice to say, Michigan and Texas are pretty special places to the fella and me.  So adding high-quality, visually beautiful prints of both of them to our little “travel wall” seemed like a no-brainer to me!

All we needed were frames.  I love going thrift shopping.  I was out on one of my thrift-shop-hops with my Mom (my favorite thrifting partner) and found two frames whose shapes were nearly identical.  Seriously, I think one of them is maybe one millimeter shorter than the other.  The funniest part is that I found the first one – an espresso finish with gold – and said it would be perfect if it had a twin, and before I even finished my sentence I found the same shaped frame with the same gold detail on it in a walnut finish.  Praise the frame gods!  AND they were $1.98 each.  Praise the thrift gods!

Fraternal Twin Frames

I got ’em home, gave ’em a light sanding and wiped ’em down with a cloth to prepare for my favorite part of the process: spray painting!

Frames Prepped For Priming

They got a coat of my go-to primer, Zinsser B-I-N.  Seriously, that stuff sticks to air.  And then this happened:

Primer Fingerprint

It was one of those “Oh no, there’s a particle on it, get it off!  Oh shouldn’t have touched that…” moments.  There’s a reason the can specifically outlines a “dry to touch” time, folks.  File that under DIY Duh… Or Primer Problems.  So I sanded and did a quick re-spray on the spot that I messed up and then let it dry for the appropriate length of time.

I followed up with Rustoleum American Accents in flat white to match the other frames on the wall.

Flat White Painted Frame

And after my least favorite part – the 48 hour dry time – I brought them inside and was reminded that one of them was missing the hanging hardware.  Luckily, I had some sawtooth hangers on hand, so I just measured to find the center and attached the hardware with the provided nails to the back of the frame.  Sidebar – I really love my tools, especially the mini ones…  Hold me closer, tiny hammer.

Tiny Hammer

Then the frames got all dressed up with their new prints!

Framed Texas and Michigan Prints

I used my usual method for deciding where on the wall these guys would hang: paper and tape.  A piece of ruled paper was close enough to the size of my frames and did just fine helping me visualize what they’d look like in their final state.  I tried a few different formations before I landed on my favorite.  As you can see, Turkish Pup was happy to help…

Frame Gallery

I don’t think frame galleries always have to be exactly symmetrical but it worked best for these prints.  That may change if I find myself adding to this group later on, who knows.  For now, they look great where they’re at!  Now me and the fella are reppin’ our favorite states with style!

Worldly Wall Art Frame Gallery

Worldly Wall Art Frame Gallery

Oh and I’d like to give a shout-out to the folks at Map My State!  I never received a tracking number when my order was shipped, and when I emailed to inquire about it they responded in less than 30 minutes!   They were super helpful and sweet, and my prints came out great!  Overall a fantastic experience with this company!

Who else is showing love to their favorite states with prints or an art project?  Do tell…

Worldly Wall Art – Part I

I’m back after a bit of a hiatus, folks.  And I am mega excited about some of the things I’m working on right now.  One of them is the wall above our sectional.  I mentioned once that I had a few empty frames hanging there…  If I’m keepin’ it real (and you know I am) I’ll tell you that these four 8 x 10s hung in this position for about eight months!

Travel Wall Art Gallery

Yep.  We looked at four framed stock photos of sand dollars for THAT. LONG.  Shame, shame Jamie.  Sidebar – how cool is the world map the frames are surrounding?  Check out the detail on that bad boy!

Michael Thompsett Map

The countries are made up of sheet music!  The art is by Michael Thompsett.  I originally bought it on Hayneedle’s flash site The Foundary but his work can be found here on Hayneedle, among other places, and they’re all so pretty!  I liked it so much that I also bought the dinosaur one for my dino-enthusiast sister.

It would be prudent to note that my posts aren’t sponsored by Hayneedle or Michael Thompsett or anyone else – I just write about things I love/places I shop.  

Back to the frames.  Even though I didn’t have anything to put in them (evidently for eight months), I had to snag them.  They were on sale at Michael’s for $5.98 each!  Once I hung them around the map, I bookmarked my brain to keep an eye out for maps, skylines or anything “place-related” that would work in the frames.  Eight months later (have I mentioned the length of time that the frames were naked yet?) my June Birchbox subscription treated me to some super cute postcards!  Each one depicts a different major city and says hello in that particular city’s language.

Birchbox Wanderlust Postcards

And aren’t the bright colors so fun?!  I switched the layout of the frames since the designs on the card are landscaped.  To mount them, I just flipped over the sand dollar stock pics, measured where I wanted the postcard and secured it to the backs of the stock pics with a bit of tape – easy peasy!  I recently made a purchase that I’ll be adding to this wall later in the week.  Stay tuned for that.  For now, here’s what we look at right before we plop our bums down on the sofa (dog included).  Much better than before, no?

Worldly Wall Art

I’d say not bad for $20 in frames and free postcards!  I’m still on the lookout for some curtains that I love to cover our super 80’s blinds – ah the thrill of the search!  I’d also love to paint the walls but that may take some convincing with the landlord.  We shall see!

Any other Birchboxers out there that loved their Wanderlust postcards as much as me?  And who else has let empty frames sit for months on end?  I know I’m not the only one… Do tell…

dream BIG

Here’s a story about a finishing touch. I’ve blogged about my media stand and the shelves I constructed out of inexpensive IKEA tables. Now it’s time to talk about the last bit I did to finish off the media area. Although I never really consider any area of our home “finished”. Our living space is ever-evolving!  Check out the media area as I last left it here in blogland (please excuse my horrible photoshop job over the tv screen).

DIY Media Stand

I mentioned once before that the media stand lives on a massive wall, and believe me that is not an exaggeration. The main wall in our front room is 11.25′ tall by 18.5′ wide. That’s a LOT of wall. Over 208 sq ft of wall to be exact. See, this wall comes down from the peak of the roof on our condo. I knew I wanted something to frame out the area over the TV and give character to the big empty “canvas”, I just wasn’t sure what…

I knew I didn’t want to hang a mirror. I have frames (that are still empty!!!  need to get on that…) and a world map hung on the opposite wall and I didn’t want the reflection to compete with whatever we happen to be watching on TV. Fun fact – you can usually find us watching Arrested Development (with which the fella and I have an unhealthy obsession), Arrow, Undercover Boss, Master Chef or trying to find out who the gal with the yellow umbrella is. We love Netflix and Hulu. Cable Schmable. Who needs it.

Back to the wall… After much careful deliberation I decided that artwork on a floating shelf would be a delight of a sight above the tv. I love all of the typographical artwork that peppers my Pinterest feed.  And artwork atop a shelf above the tv was just the thing to add height to our little setup.  I have been known to sketch out my plans.  Not to scale or anything, I just like to put pen to paper to help visualize what I want my end result to look like.  Fancy, no?

Sketch of media stand idea

And then it was off to Hobby Lobby I went, where thanks to a sale and my coupon from the HL phone app, I scored a two-pack of 16″ x 20″ canvases for a pretty nice price (I think it was around $8). I have oodles of acrylic paint in my craft stash, so I picked a blue that was similar to my shelves and media stand and a soft green that resembled my jade-colored frame gallery (I’ll have to show that off on here at some point).

Acrylic Paint Colors

I went for a “washed” or “water colored” effect by mixing about one tbsp of paint with a few oz of water. I just squirted the paint right into a little jar, screwed the lid on tight, and shook it like crazy until it was mixed.

There was no method to my painting madness – I just slathered the stuff on with a little coarse bristle brush until I liked the look of it.

Wash Painting

After one coat of green and one coat of blue these canvases were asking for more. So I gave them some wispy, whimsical squiggles courtesy of some leftover yarn in my stash.  I soaked the yarn in the blue paint mixture for a few minutes and then laid it haphazardly on the canvases to create the squiggly lines.  I then let them dry for around 24 hours.

yarn

Then it was time for the fun part – the wording!  “Dream big” is a serious statement.  It serves as a reminder that we can definitely accomplish great things if we dream big enough and stay focused on our goals.  It’s just the kind of encouragement I want to look at every time I walk in my front door.  I went with a cursive font for the word dream and “impact” for the word BIG.  I simply printed them out on paper and traced them on to my Martha stencil film, then cut the words out with my handy-dandy Xacto.

Stencil - Dream

Martha Stewart vinyl stencil paper.

The stencils were carefully adhered to the canvases and I went to town with plain white acrylic paint.  I had to keep little segments on the stencil on the d, e, a and b so that I could keep from painting the inside of the loops.

Stenciled Words

As soon as the words were painted, I carefully peeled off the stencils while they were still wet to keep the edges from peeling.  Then I painted over the areas where my strips were to close my letter loops and let the canvases dry for another 24 hours.

Wall Art - Words on Canvas

As for where these beauties hang out now, I bought two white 48″ floating shelves and mounted them to the wall according to the instructions.  This took a lot of measuring, drilling and screw-driving, which my handsome fella was so gracious to help me with.

Mounting Shelves

I set my newly made artwork on the shelves with a few miscellaneous decorative items (they’re designed to hold around 30lbs each so I didn’t want to load them up crazy style).

Media Stand Entertainment Center DIY

As for this “finishing touch” on our media area – I’m in love!  It’s so nice to glance up there and get a little inspirational shot in the arm on the regular!

Any other folks out there jazzing up massive walls with homemade art, floating shelves or any other fun items?  Do tell…